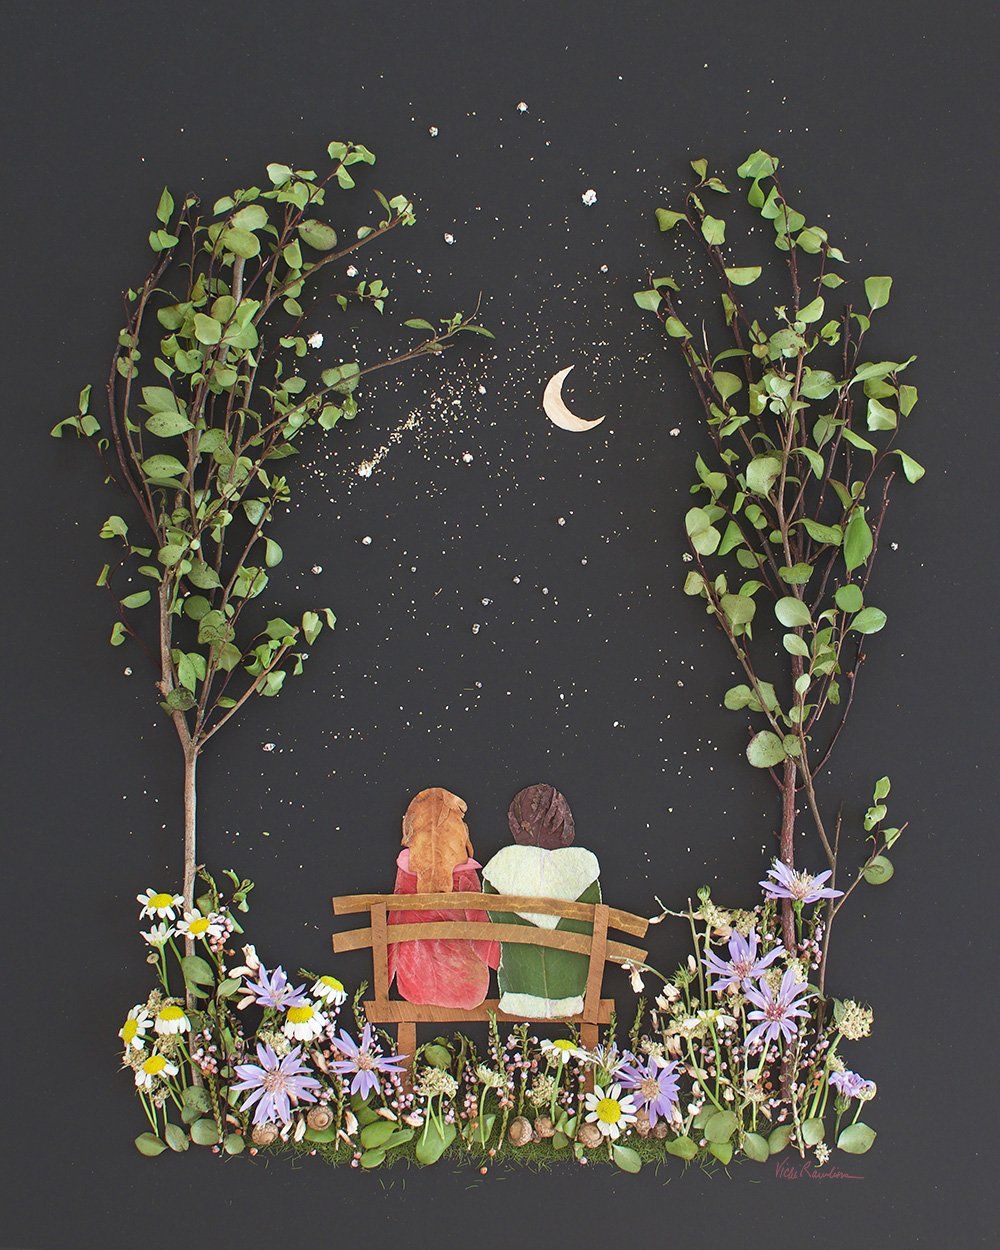
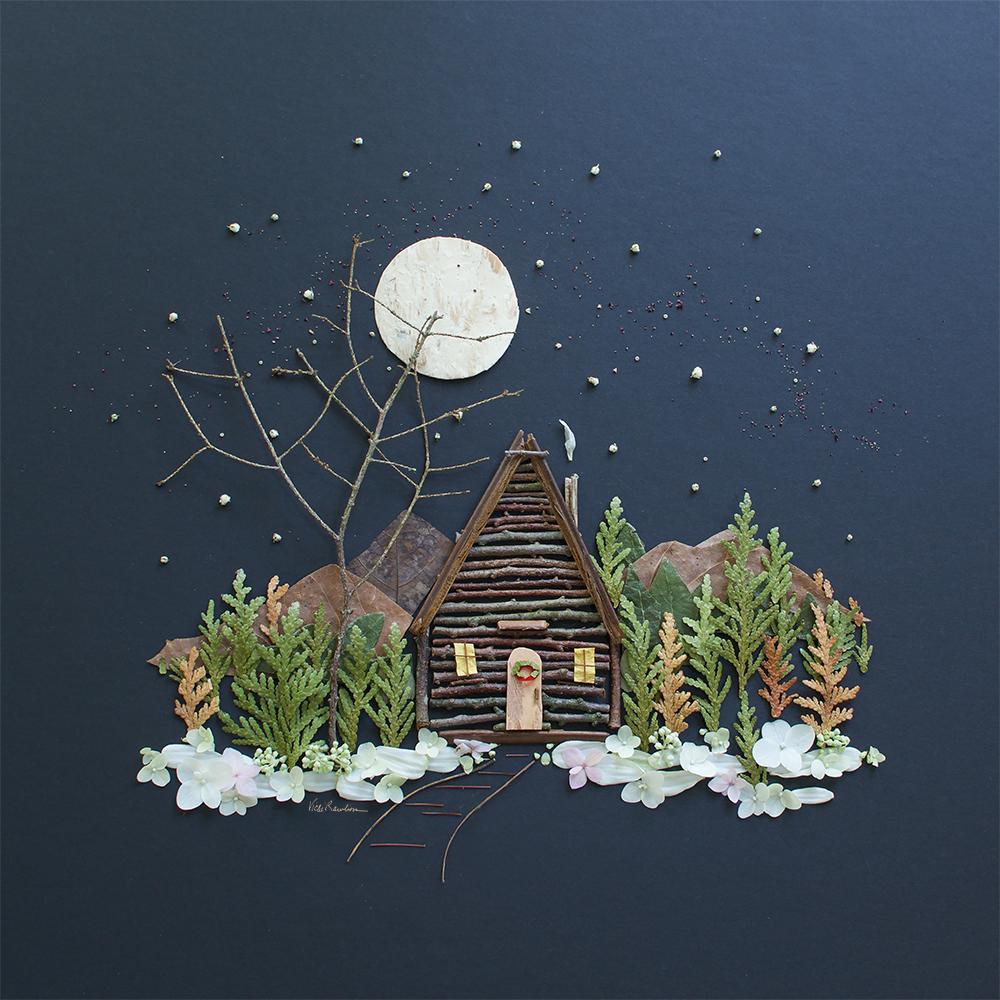
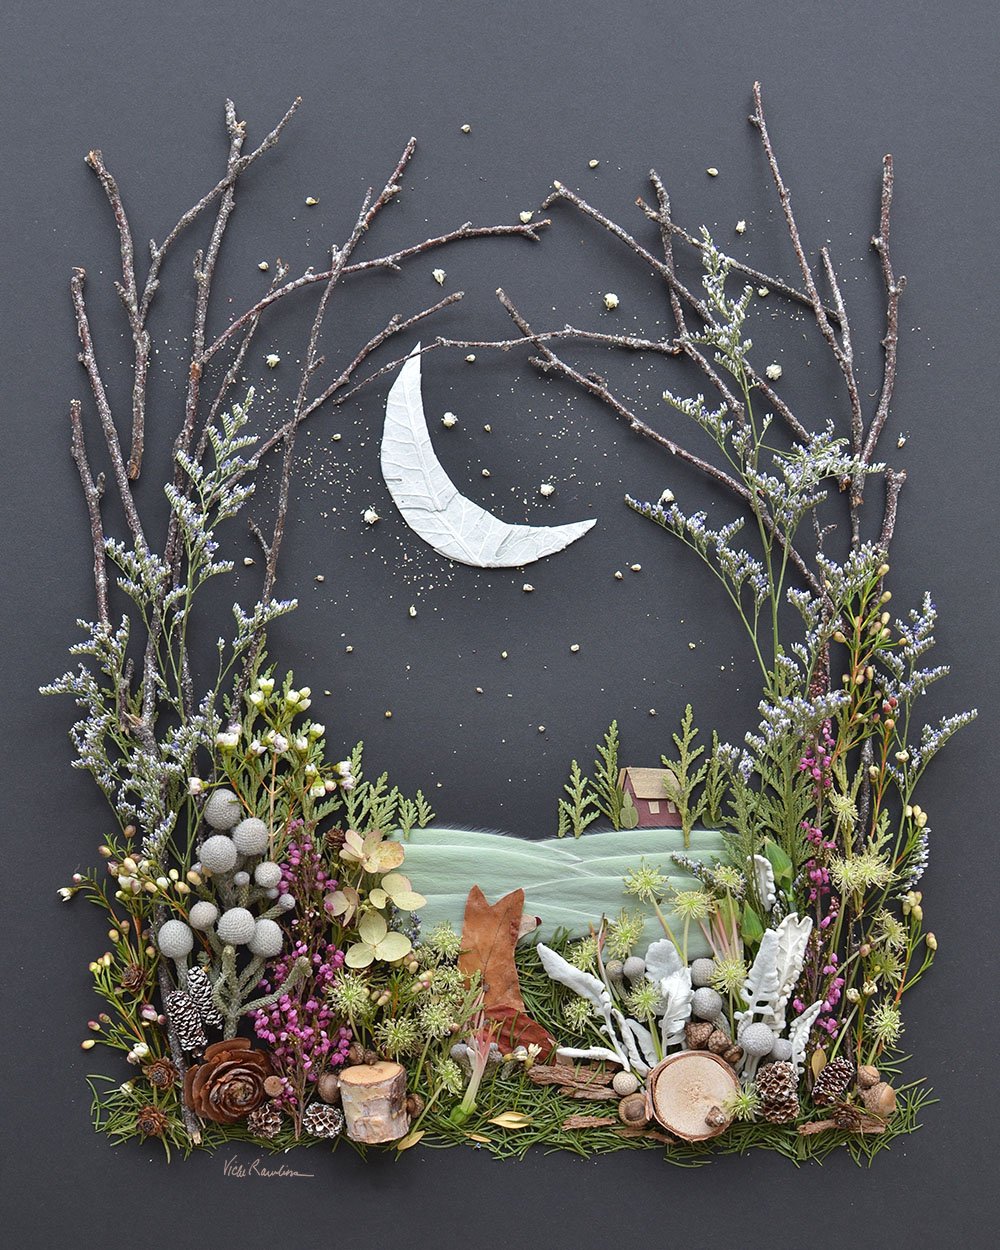
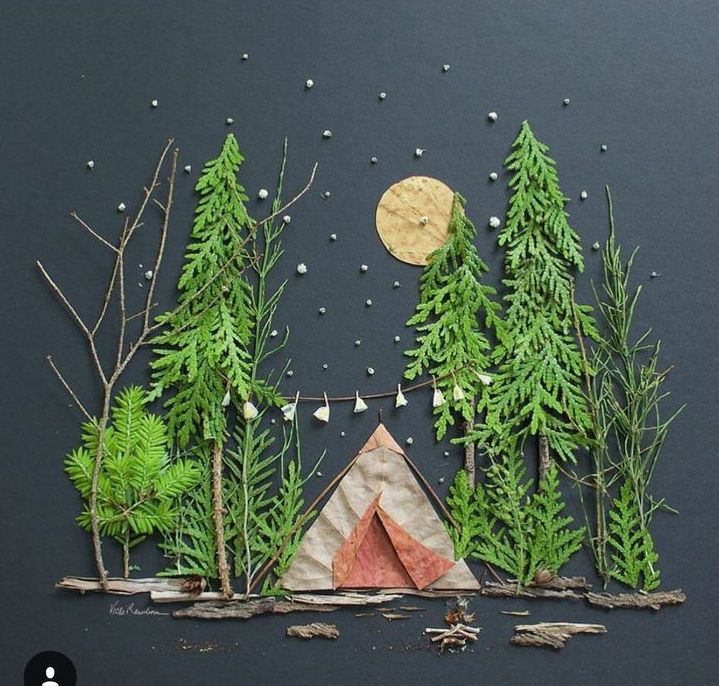
Vicki Rawlin's Nature Collages"The actual act of creating each piece, for me, is therapeutic, spending lots of time outside walking and foraging, truly in the moment, my eyes scanning every square inch of my surroundings. - Vicki Rawlins About the Artist... As you can see from the images, Vicki Rawlins loves to explore nature and all of the wonderful textures, colors and patterns it has to offer. Rawlins spends countless hours wandering the wilderness and collecting natural items that catch her eye. Back at her studio, she playfully arranges her found objects to create beautiful collages that highlight the each unique piece she has gathered. |  |
Check out more of Vicki's work on her webite/shop "Sister Golden" below.
Let's Begin...
Today we will be creating a collage inspired by Rawlin's work. Our theme for this artwork is "Goin' Camping!" I know we are all itching for summer weather to be here so that we can get out of town and enjoy the wilderness with our families. I have created two different examples that you can use to fit your camping style....tent or camper.
Most items from this collage will be gathered from your own back yard or a walk in the woods. Some of the materials can be recycled from home as well.
You will need...
Most items from this collage will be gathered from your own back yard or a walk in the woods. Some of the materials can be recycled from home as well.
You will need...
- paper for your collage (Rawlin's uses black paper, but you can use any paper you have on hand and can even design your own paper-see below)
- White paint, crayon, chalk or pastel (even white out will work)
- Glue (HOT GLUE works best to avoid dry time but any glue will work)
- TONS of cool things gathered from nature (pinecones, needles, branches, seeds, stems, flowers etc...)
- Photo of your child to cut out (optional)
- Cue Tips for roasting marshmallows (optional)

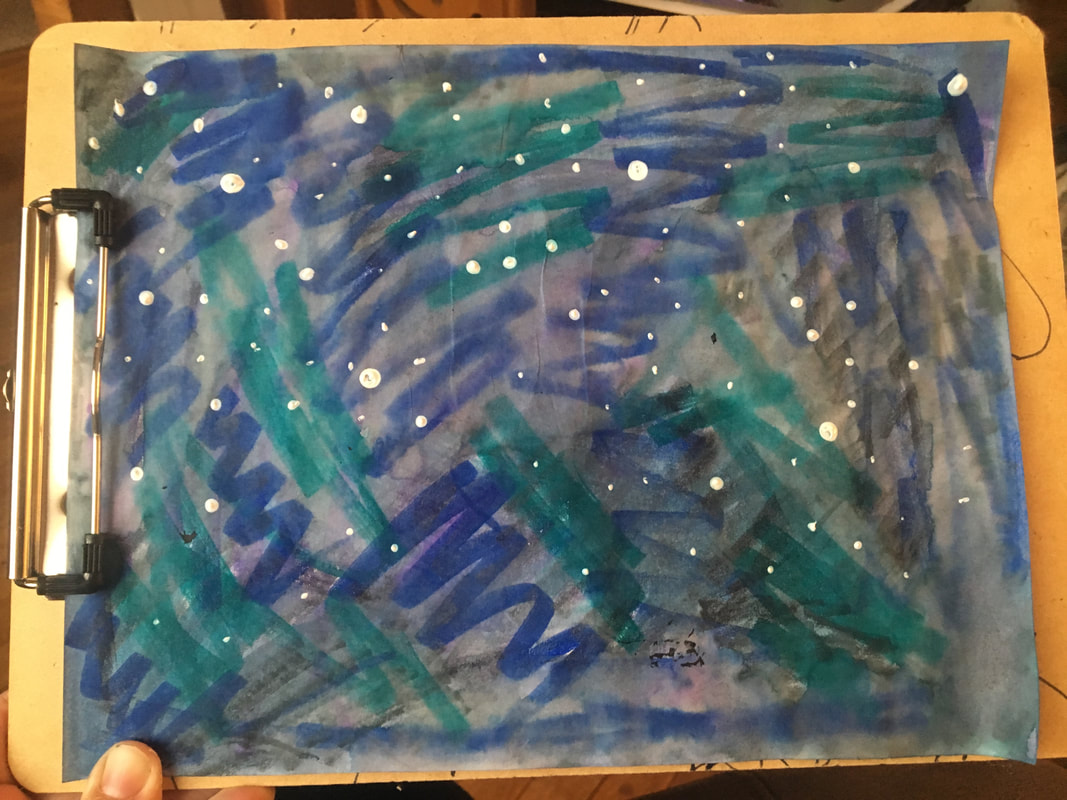
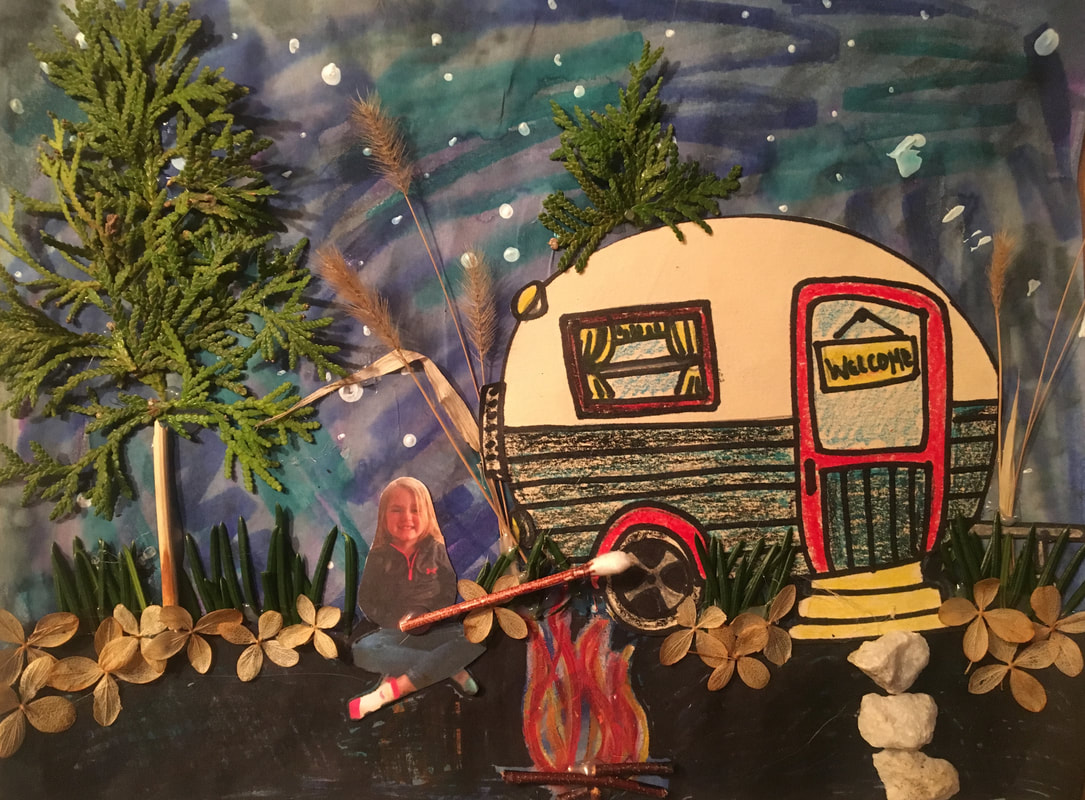
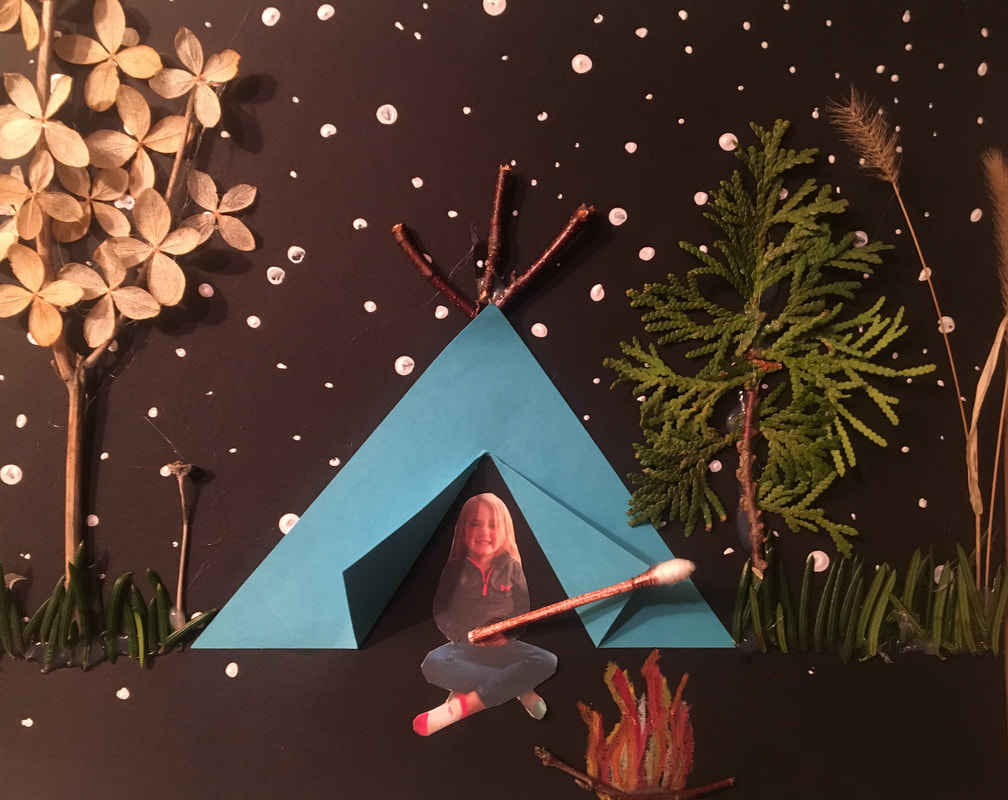
STEP 1: Background "Night Sky"Using a skewer, toothpick, end of a paint brush, pencil (anything small and pointy) you can use some white paint to dot some stars onto your night sky. If you have a tooth brush to spare, you can try this neat trick to speckle your night sky with stars as well. If you do not have white paint, a crayon, colored pencil, or pastel works great too! | 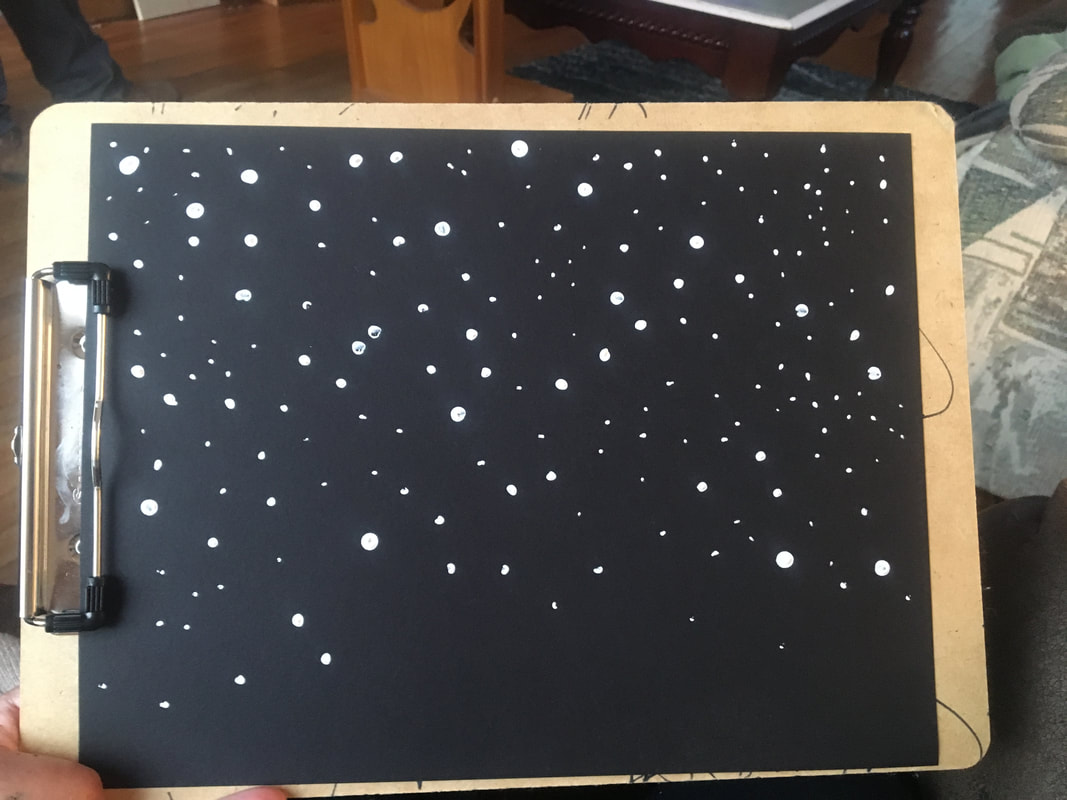 |
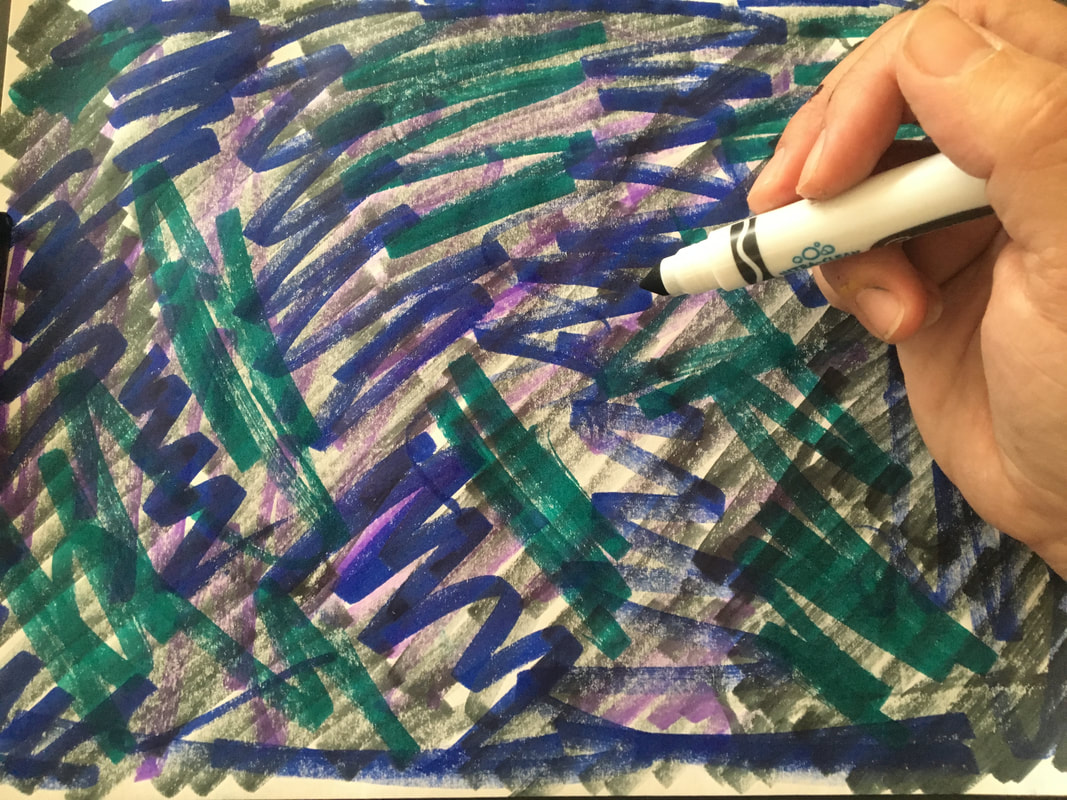
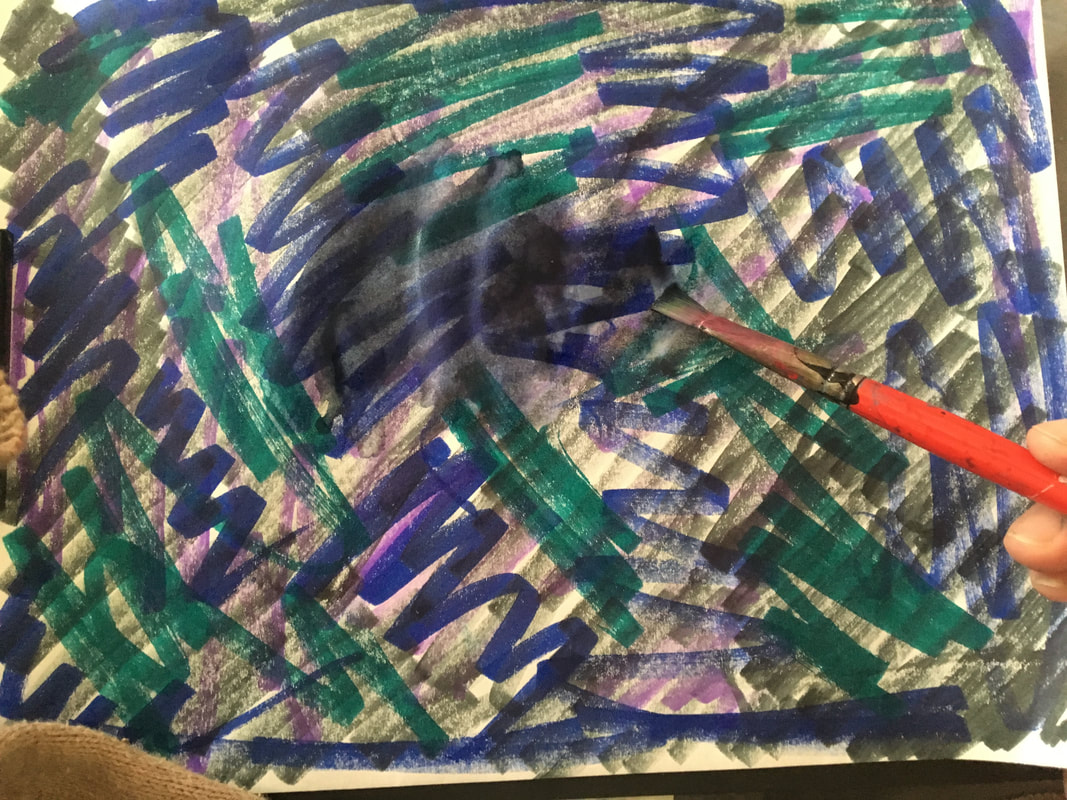
If you do not have a solid colored sheet of paper you can definitely design your own. For this paper, I used a trick with washable marker. Color first with any washable markers and brush water over top to get a watercolor effect. After your paper dries, you can speckle it with stars as well!
STEP 2: Create your TENT or CAMPER
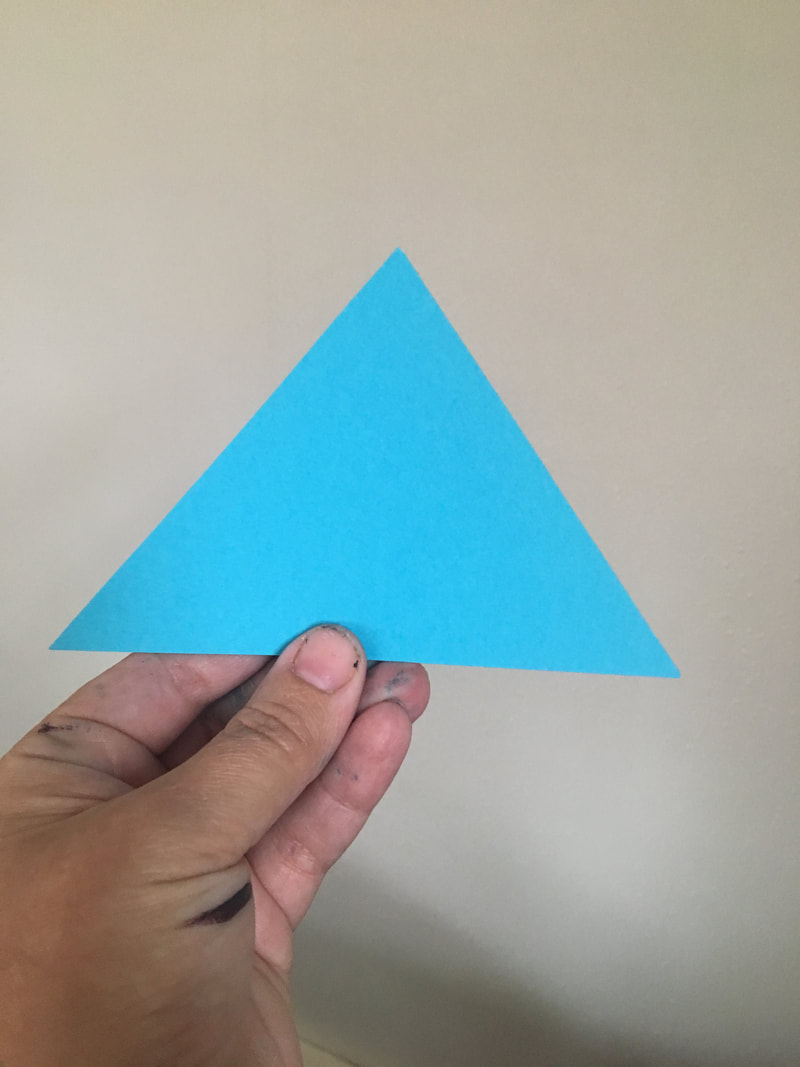
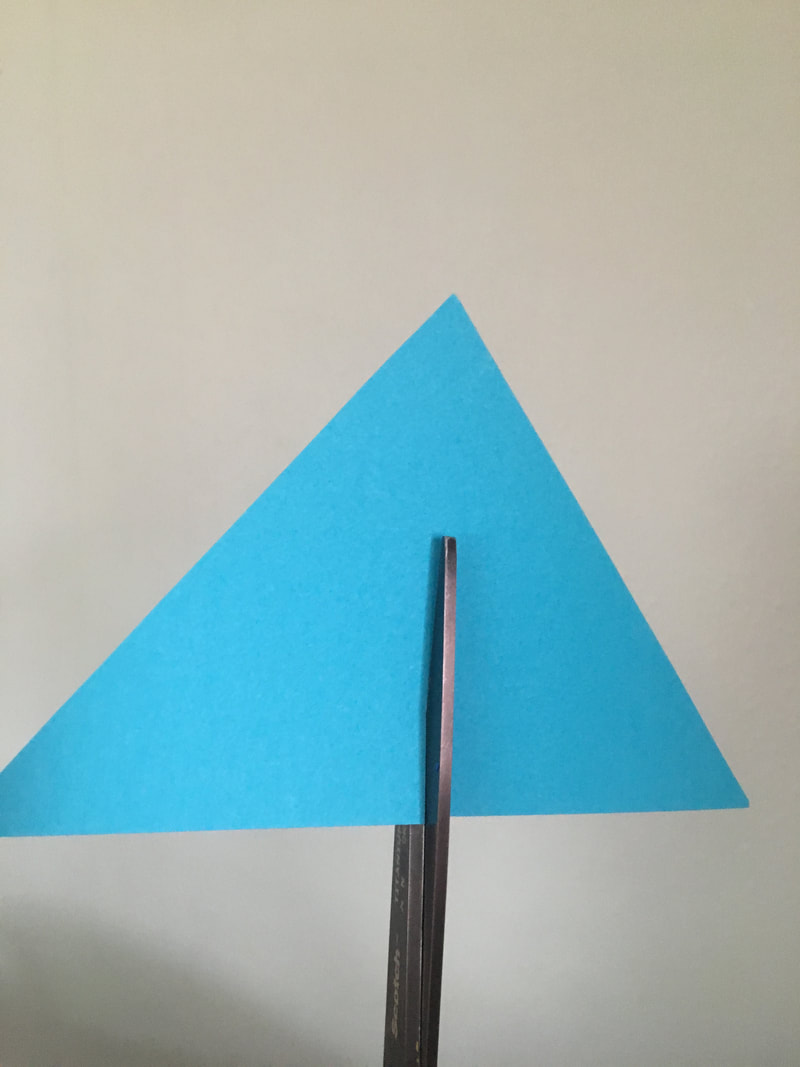
| TENT: for the tent, you will need a simple triangle. The size of the triangle will ultimately be the size of your tent. Once you cut out your triangle, cut a slit about 3/4 of the way up the middle of your tent. Then you can fold both flaps away from the middle to create your opening. Glue your tent to your paper (HINT: leave some space at the bottom of your paper for the ground) |  |

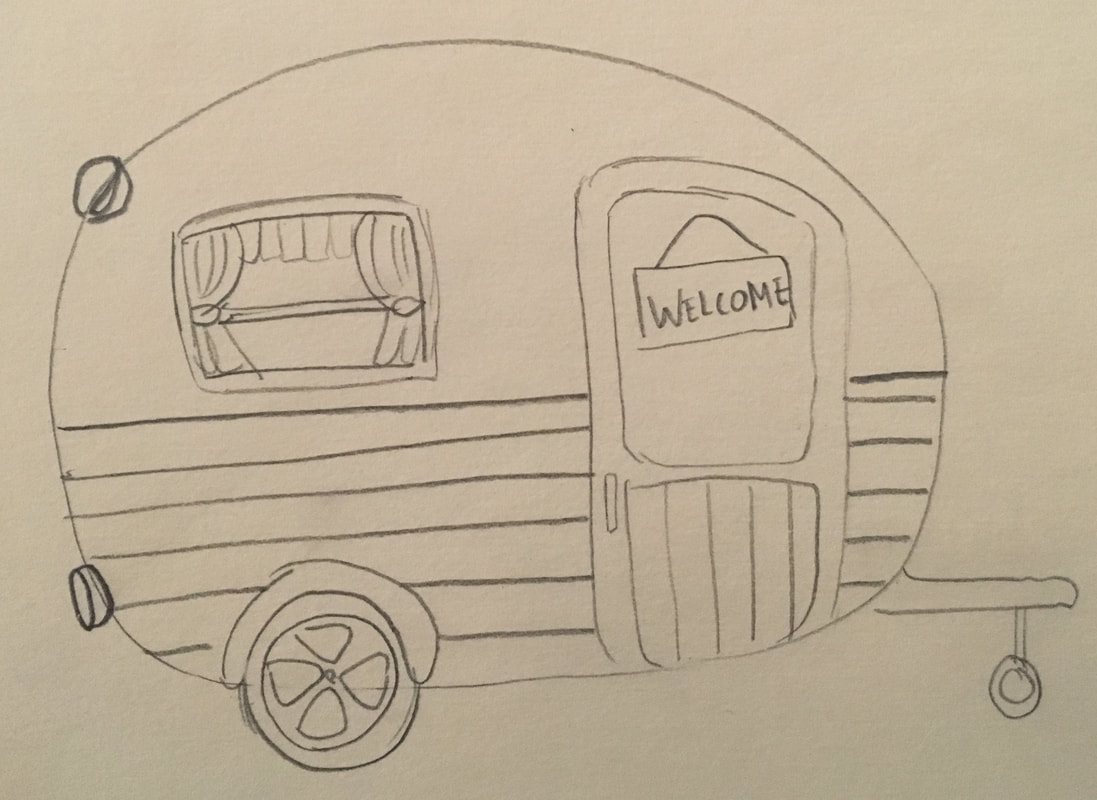
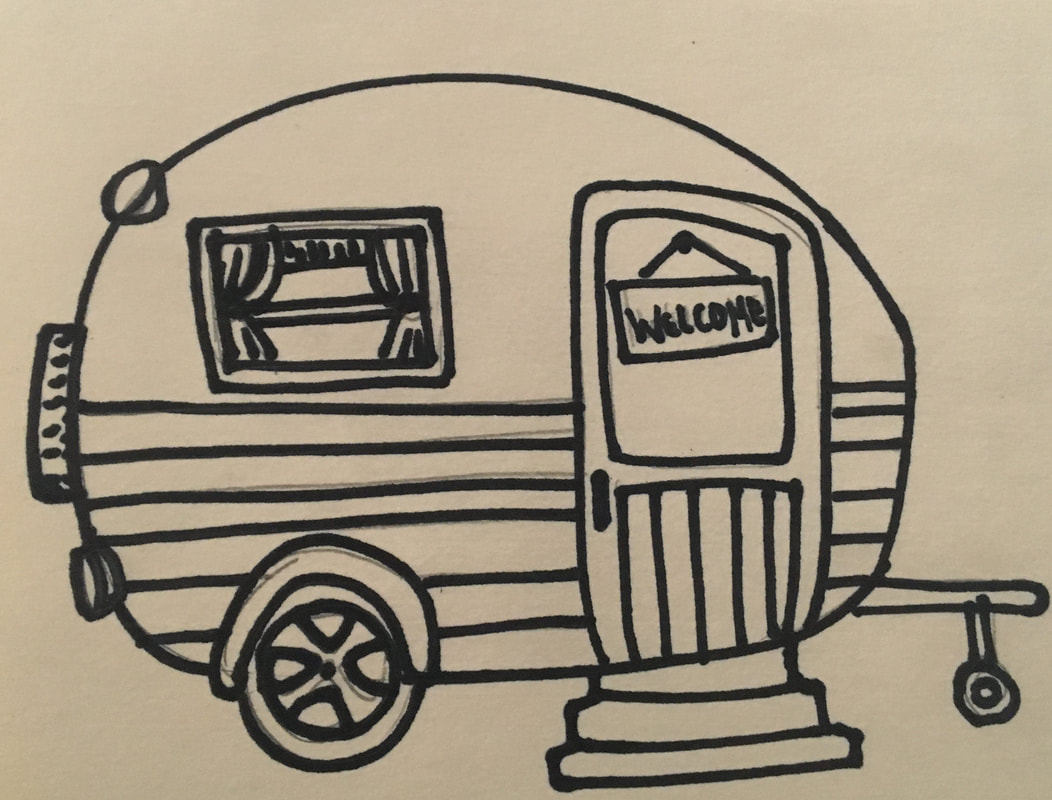
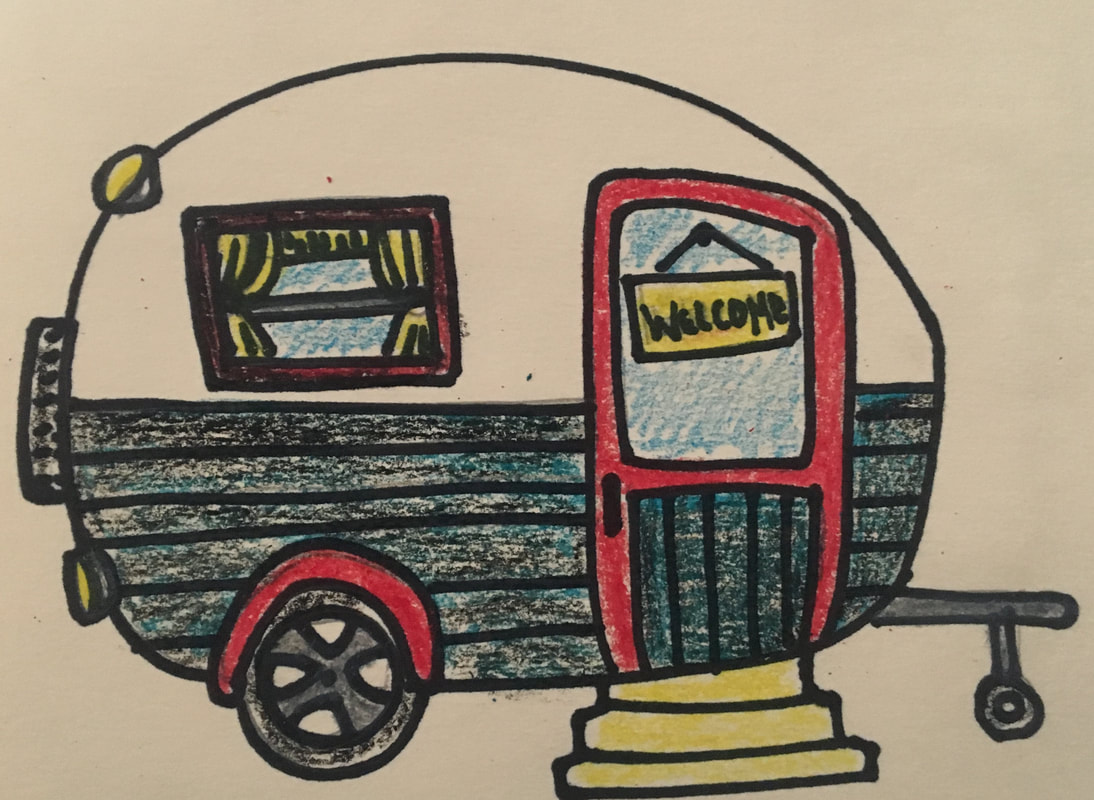
| CAMPER: for the camper, you will simply want to draw the camper you want (with LOTS of DETAILS). Pencil first, sharpie second, add color last. Glue your camper to your paper. |  |
STEP 3: Take a WALK to gather some cool things in NATURE!Get out, get some fresh air, and get your imagination rolling! Bring a bucket or container along to gather tiny things you find that can be useful in your collage. We found pebbles, seeds, branches, needles, leaves, dried flowers, stems etc. What cool things can you discover? Remember! These items need to be glued onto your paper so try not to grab anything that is too big or heavy.  | 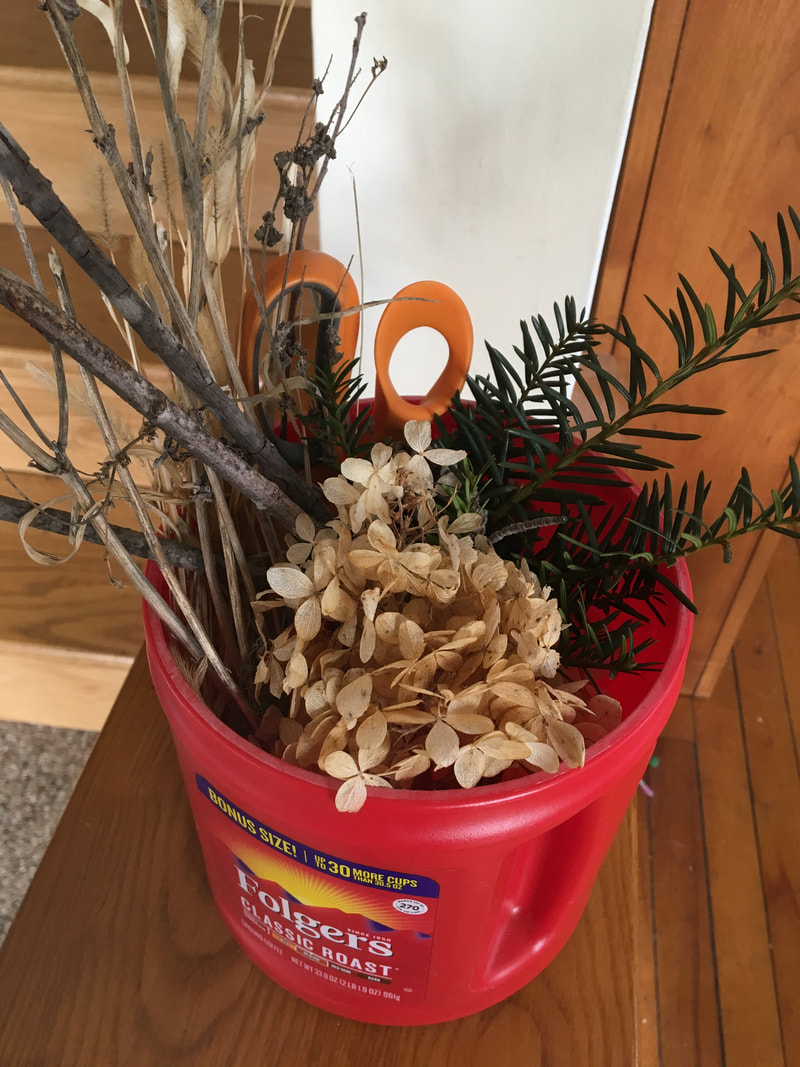 |
STEP 4: CUT and GLUE items to your COLLAGECAMPER: I had a picture of my daughter that I was willing to cut up so I cut her out and glued her down where I thought would be a good place for a fire :) Next I used some crayons to draw the flames of my fire as nothing I gathered was red or yellow. |  |
| GRASS for GROUND: We used some flat needles we found to create a line of grass that represents the ground. We also broke apart twigs to use as the logs in the fire and supports for the tent. |  |
| TREES, FLOWERS, STONES etc...: Try to get as creative as you can by using different textures to make LOTS of details in your camping collage. MARSHMALLOWS! using a cue tip, we colored the stick part brown and left the fluffy part white. When we glued it into my daughters hands it looks just like a marshmallow on a stick! |  |
 RSS Feed