| Being that we have been out of school the entire month of April, I know a lot of kiddos have missed celebrating their birthdays with their family, teachers, and friends. It is only right that we dedicate an art project to those born in the month of April. The DIAMOND is April's Birthstone. Diamonds develop deep in the ground under great pressure. The gems are the crystalline form of carbon. Diamonds are the hardest naturally occurring substance on Earth! Try drawing some other GEMS and CRYSTALS! |  |
| Let's Get Started.... You will need....
|  |
| ||

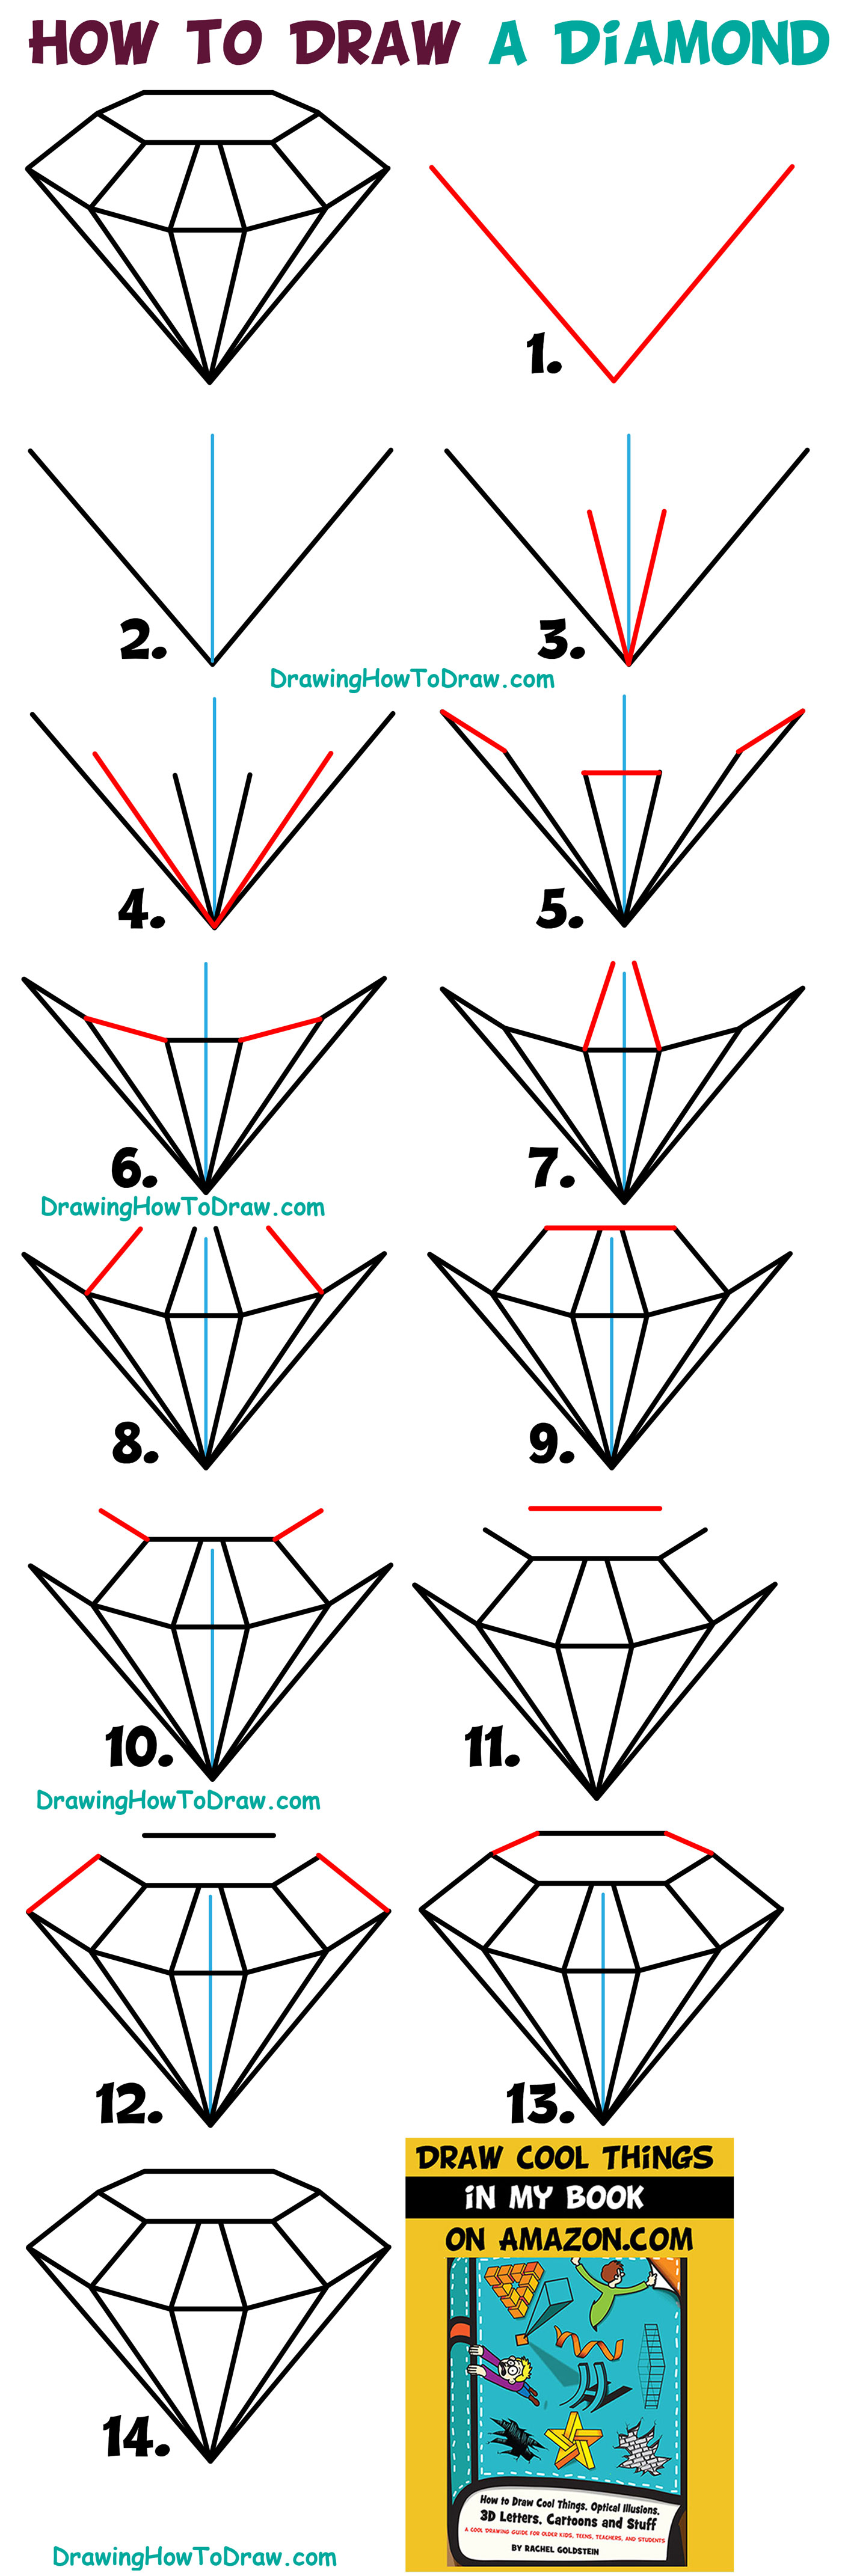
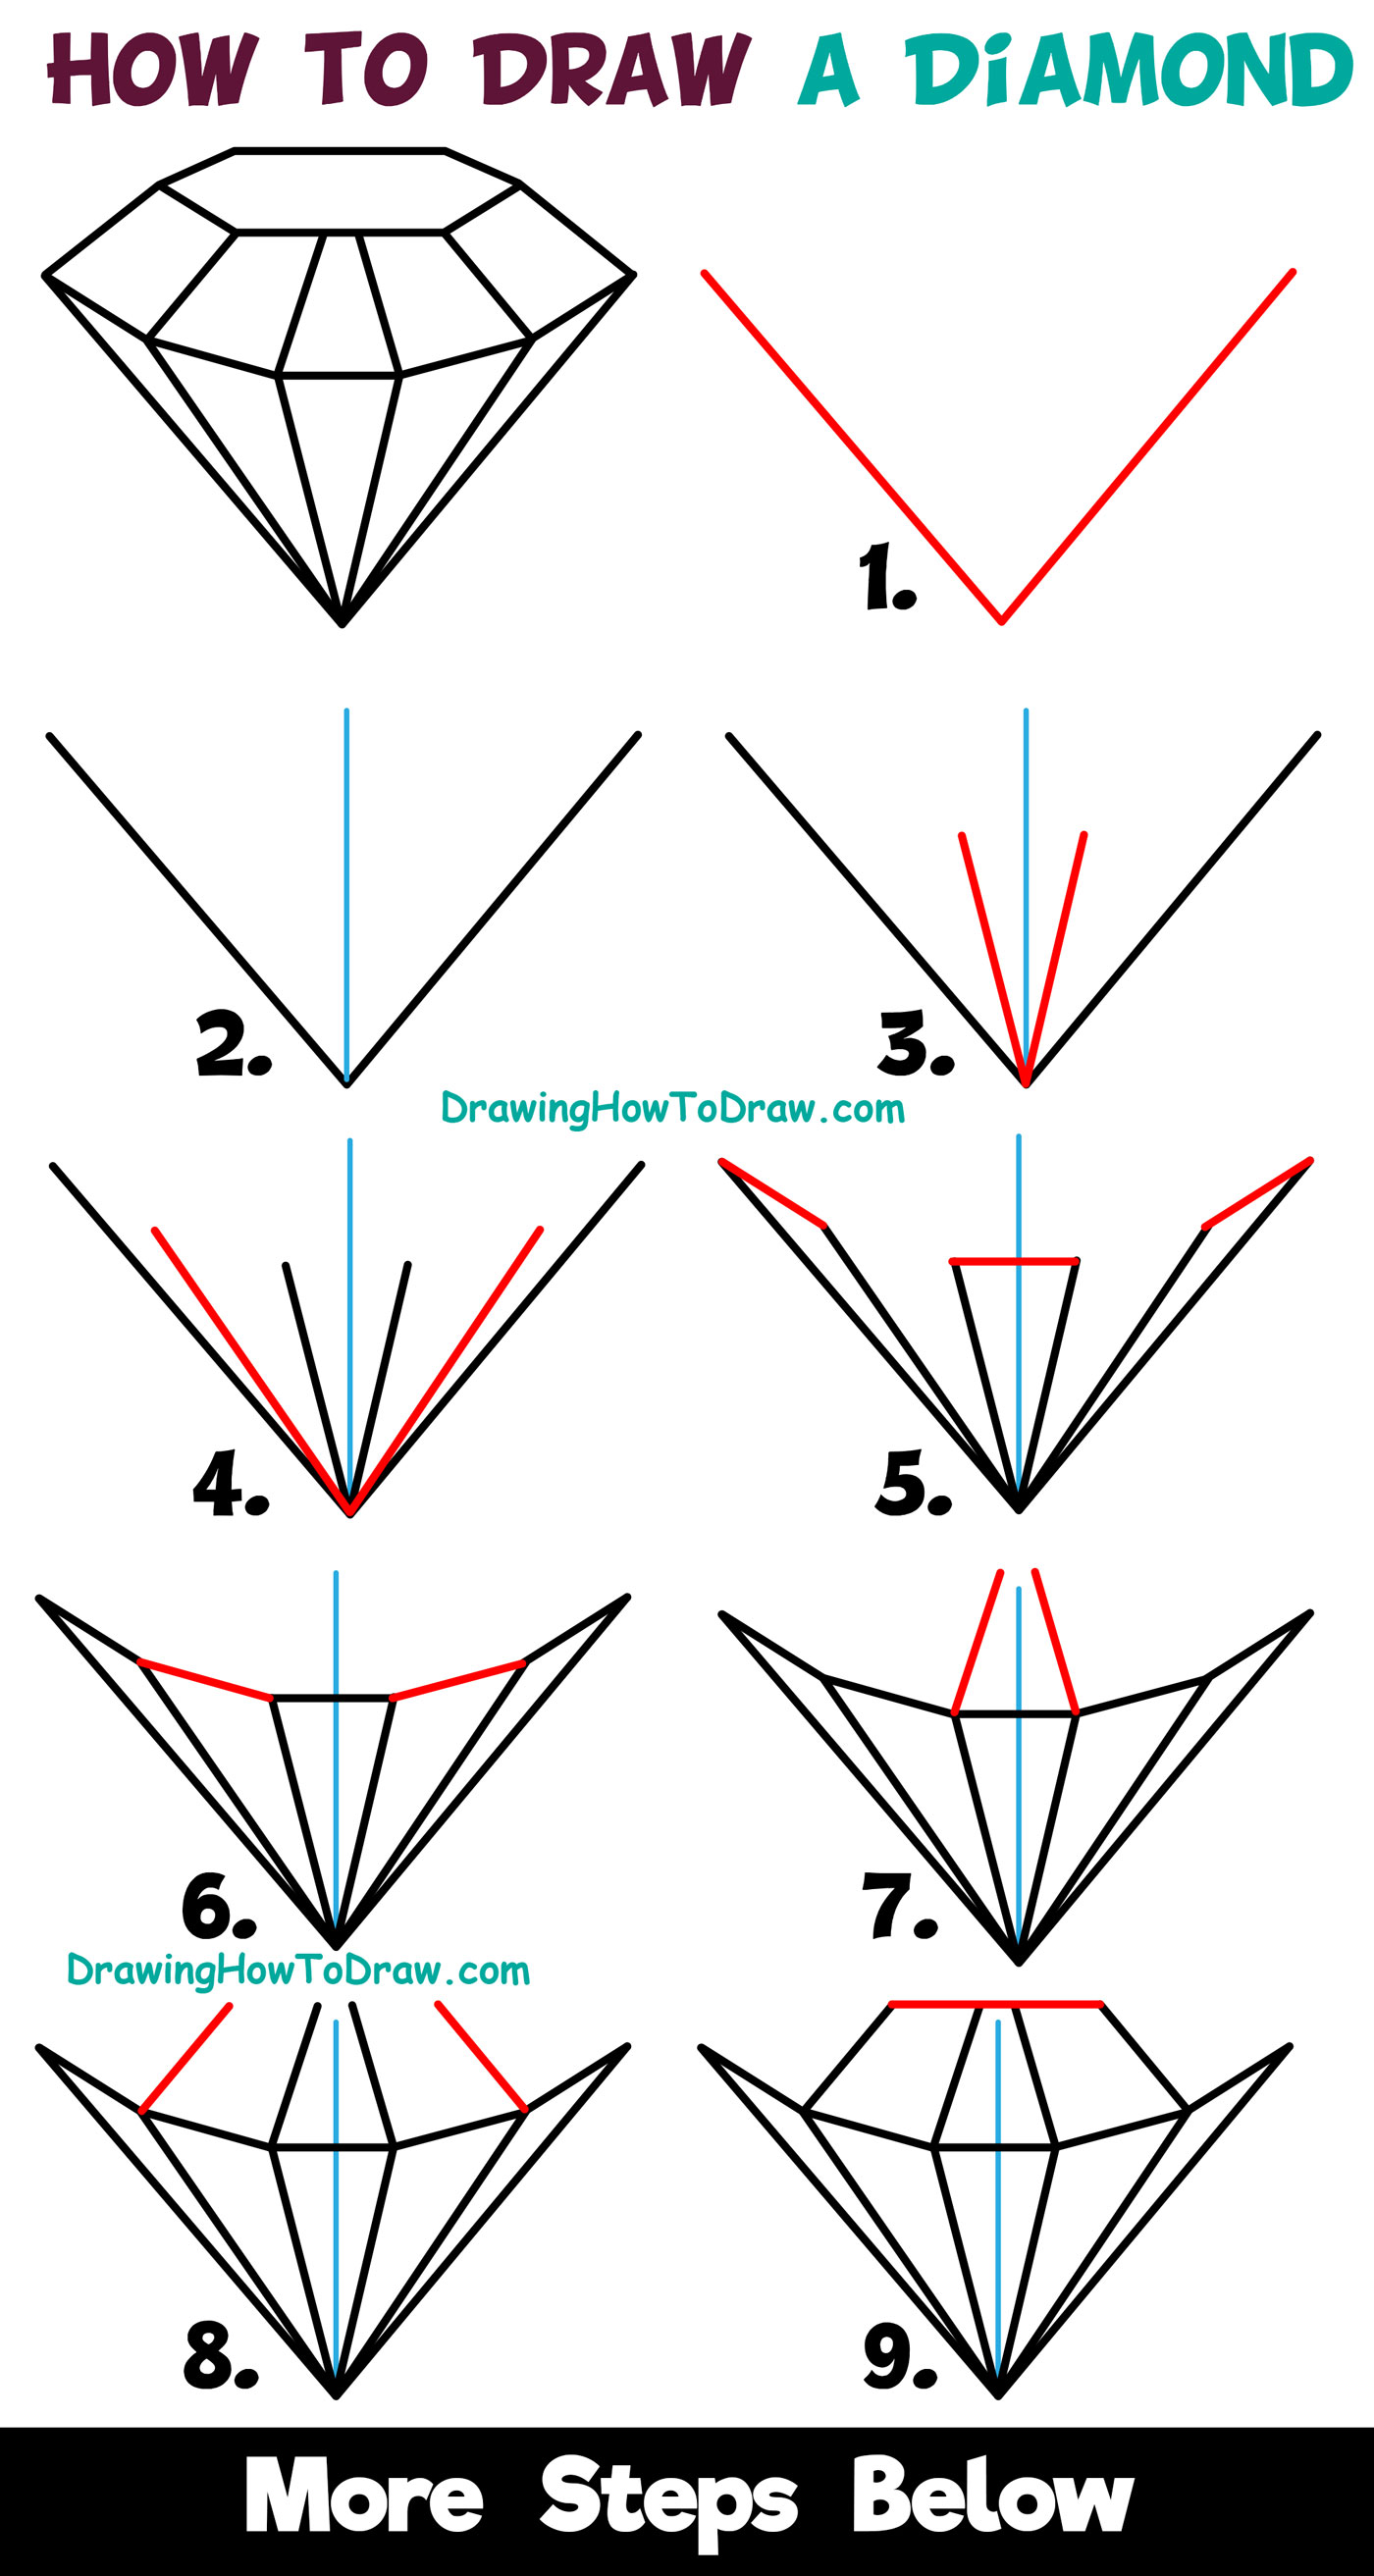
| STEP 1 : Draw your Diamond Sharpie your Pencil Lines (USE A RULER!!!) Using your Ruler or straightedge and the "How to Draw a Diamond Handout" (courtesy of DrawingHowToDraw.com) begin to draw your Diamond one LINE at a time. We have learned that it is very simple to draw complex and tricky things like a Diamond by slowing down and taking it one LINE or SHAPE at a time. If you do not have a ruler, poke around your house to find something else that has a hard straight edge ( books, folders, and envelopes all work great ). |  |
Version 1: Oil Pastels!!!!
VALUE is one of the 7 elements of art. Essentially, it's making light and dark with varying values in-between. Think about black, white, and lots of different grays.

GREYSCALE

MONOCHROMATIC VALUE SCALE

Step 2: Practice
| Lets create a practice value scale next to our diamonds |  |
| |
 | Put a STAR where you would like your LIGHT SOURCE to be. |
STEP 3: Where is the LIGHT?
Step 4: SHADE in appropriate VALUE
| Begin to SHADE in each section with the appropriate TINT or SHADE according to your LIGHT SOURCE. |  |
 | STEP 2: Trace your lines with Glue Using a plain white craft glue, simply trace over all of your pencil lines. You do not need to squeeze very hard as you just want a thin line. Try to avoid getting puddles. The glue will resist the paint and keep your pencil lines white in the next steps. If you DO NOT have glue you can trace your pencil lines with a white crayon, or white oil pastel. |
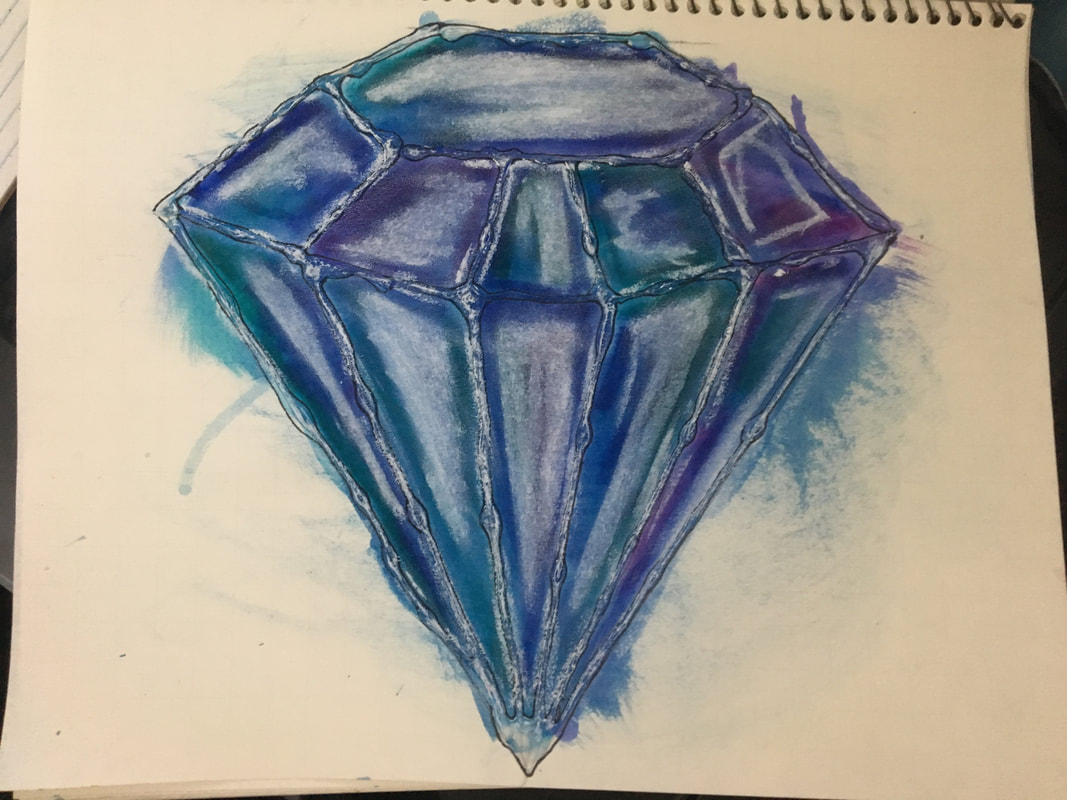
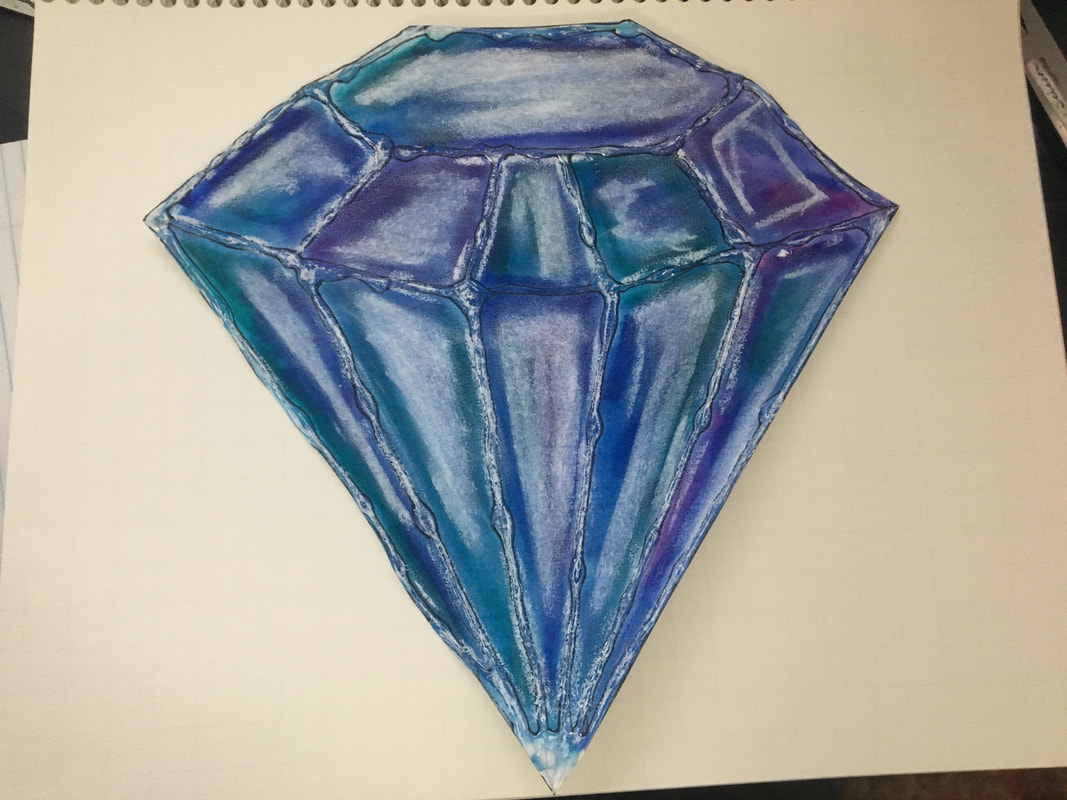
| STEP 3: Trace with a Sharpie When you glue is completely dry, take a sharpie, or permanent pen/marker and trace the edges on both sides of your glue lines. This line WILL NOT be straight and that is ok. When we add color in the next step, it will resemble light, shimmering on the cut edges of your diamond. | 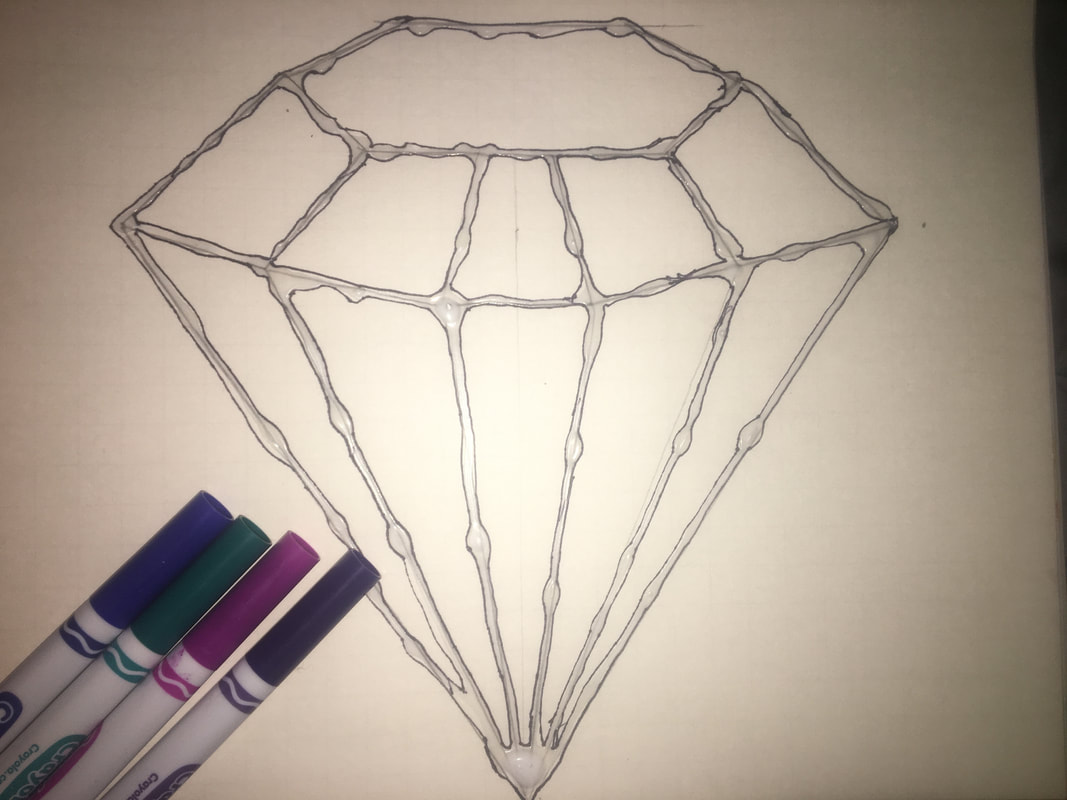 |
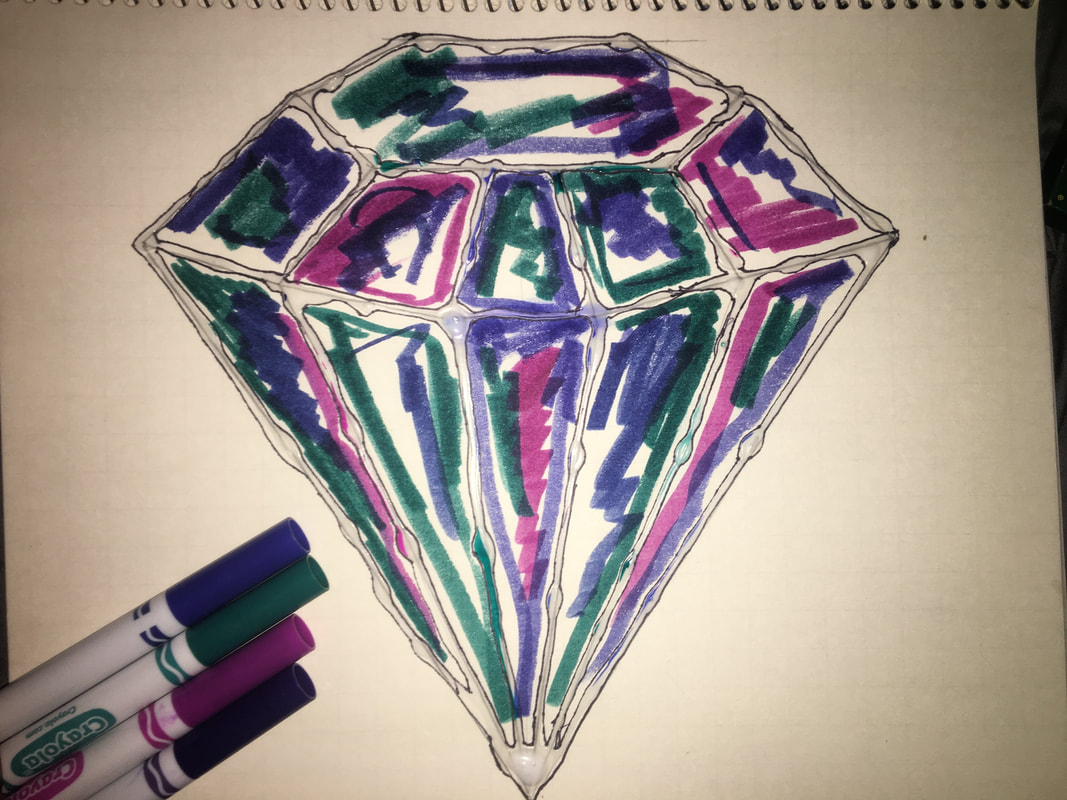
VERSION 2: Glue and Marker
| STEP 4: Pick your COLORS These look best when you choose a limited color palette. This is when an artist limits the colors in their artwork to 2 or three colors that look really great together. I am going to use two COOL COLORS ( PURPLE, and BLUE). Check out the color wheel and combination guide HERE to help you with some choices! Once you choose your colors, color areas of your diamond with washable markers. Make sure to use more than one color in each section so that the water allows colors to mix. Every section DOES NOT need to look the same. Brush over top of your diamond with water when you are finished! check out how the glue resists the color when water is added. You could also use watercolor paints or make your own paints! |  |

 RSS Feed