"A bird doesn't sing because it has an answer, it sings because it has a song."
 |  |  |  |  |
Charles Almanzo Babcock, Oil City, Pennsylvania Superintendent of Schools, established the first Bird Day in 1894. It was also the first holiday in the United States dedicated to the celebration of birds. Babcock founded the day, observed annually on May 4th, to advance bird conservation as a moral value.
We honor our feathered friends on several holidays called Bird Day in the United States. The day celebrates birds of all kinds across North America. With over 2,000 species of birds in North America, birdwatchers and nature lovers alike will appreciate the beauty and variety of these winged friends offer. From songbirds to waterfowl and domesticated birds, they come in every color of plumage and wingspan.
During the spring, migrating birds move to their summer nesting grounds. It’s an excellent time for those new to birdwatching to learn to identify birds by species. Enthusiasts also know that birds will migrate through backyards and stop for a rest, a bite to eat, and a drink if the right habitat is provided. They stand prepared by their windows with binoculars and watch as new visitors arrive daily. Whether it’s an oriole, a tree swallow, the ruby-throated hummingbird, or an American Finch, you’ll want to make sure you’ve prepared food, natural habitat and water sources for your guests.
Let's Get Started...
This Oriole Origami Project is inspired by and adapted from RED TED ART.
| You will need...
|  |
 |
|  |
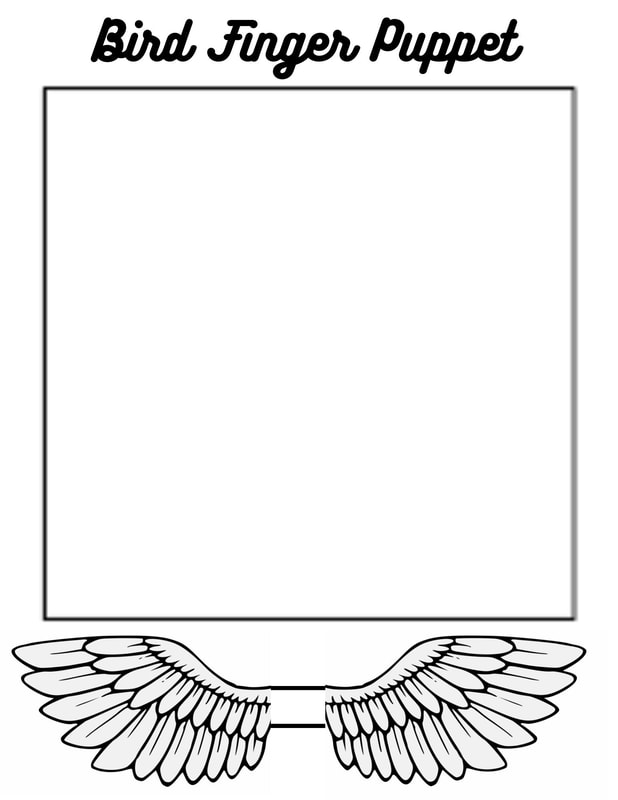
| STEP 1: Prepare your paper and begin folding If you are using a template from above, cut out the square and begin folding. If you are using a rectangular sheet of paper to start. Create a square by following the video here. | |
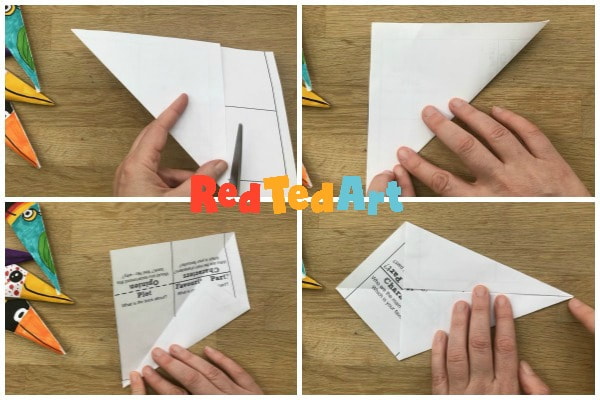
STEP 2
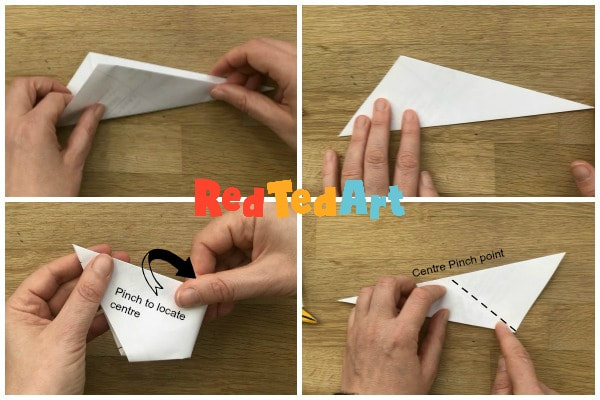
STEP 3 (if you have a hard time with this step...see video demonstration below)
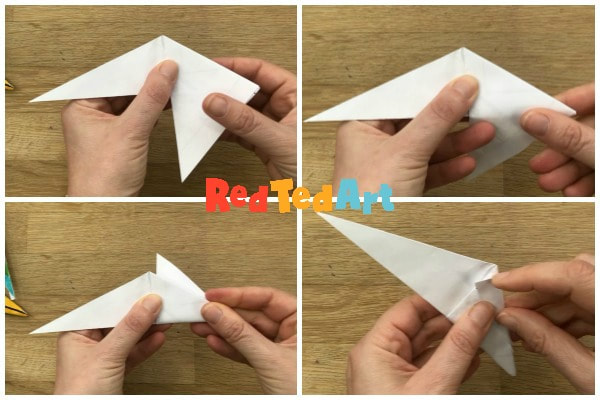
| VIDEO DEMONSTRATION If you follow along better with a video, here are instructions that have been provided by RED TED ART via YouTube. **PLEASE NOTE that this version does not have wings. This is an addition that I have created in this lesson. Read further to learn how to attach the wings. | |
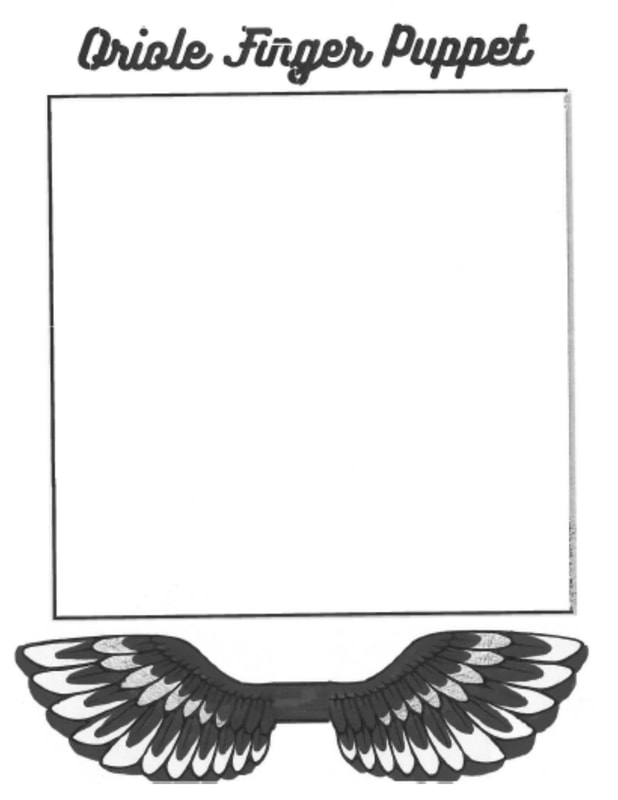
If you are designing an ORIOLE, draw your beak and eyes first. Next, make a line for the belly of the bird (this will be BRIGHT ORANGE). Finally, color in your bird body. When you are finished coloring, carefully cut out your wings (keep them connected!)
 |  |  |  |
STEP 4: Design your Bird
If you are designing your own bird, begin to color your bird body on both sides. Don't forget to had eyes and a beak! You can design your wings however you would like. When you are finished coloring, carefully cut out your wings (keep them connected!)
If you are designing your own bird, begin to color your bird body on both sides. Don't forget to had eyes and a beak! You can design your wings however you would like. When you are finished coloring, carefully cut out your wings (keep them connected!)
 |  |  |
| STEP 5: Attach your Wings Whether you are using liquid glue or a glue stick, put a small amount of glue on the rectangle that is connecting both wings. Place the wings where you would like them to go on the back of the bird and pinch. It is a good habit to say your ABC's while waiting for glue to stick.
|  |


 RSS Feed