 |
|  |
| Trees are an important part of our world. They provide wood for building and pulp for making paper. They provide habitats (homes) for all sorts of insects, birds and other animals. Many types of fruits and nuts come from trees -- including apples, oranges, walnuts, pears and peaches. Even the sap of trees is useful as food for insects and for making maple syrup -- yum! Trees also help to keep our air clean and our ecosystems healthy. We breathe in oxygen and breathe out carbon dioxide. Trees breathe in carbon dioxide and breathe out oxygen. We're perfect partners! | Acorn to Oak Tree Time Lapse Video |
Trees do lots for us, our environment and other plants and animals in nature but we don't just love trees for practical reasons. Trees can also be very beautiful -- tall enough they seem to touch the sky and so big around you can't even hug them. Thousands of artists, professional and amateur alike have painted pictures of trees and thousands of poems, songs and stories have been written about them. I would guess that just about everyone on earth has at some point in their life stopped to enjoy the beauty of a tree (KidZone)
 | About Dr. Seuss... Dr. Seuss, whose full name is Theodor Seuss Geisel, changed children’s literature forever with his whimsical characters, unique use of words and by introducing a message to his stories. His stories teach children tolerance, respect, gratitude, kindess and how to stand up for themselves. |
| This beloved story is one of Dr. Seuss’s most famous books. The Once-ler starts tearing down the Truffula trees to make garments for his new business. The Lorax appears out of the stump of the tree and says that he speaks for the trees as they have no tongues. The Lorax warns the Once-ler to stop what he’s doing, but the Once-ler continues to tear down the trees and creatures flee their environment. The Lorax allows young readers to experience the beauty of the Truffula Trees and the danger of taking our earth for granted, all in a story that is timely, playful, and hopeful. The book’s final pages teach us that just one small seed, or one small child, can make a difference. Lets read the story first! | The Lorax by Dr. Seuss |
 | Let's Get Started...Today we will be creating our own Truffula Trees! We will be using a variety of materials and there are LOTS of creative choices to be made. But first! A little tune to inspire us while we work! |
| You will need...
|  |
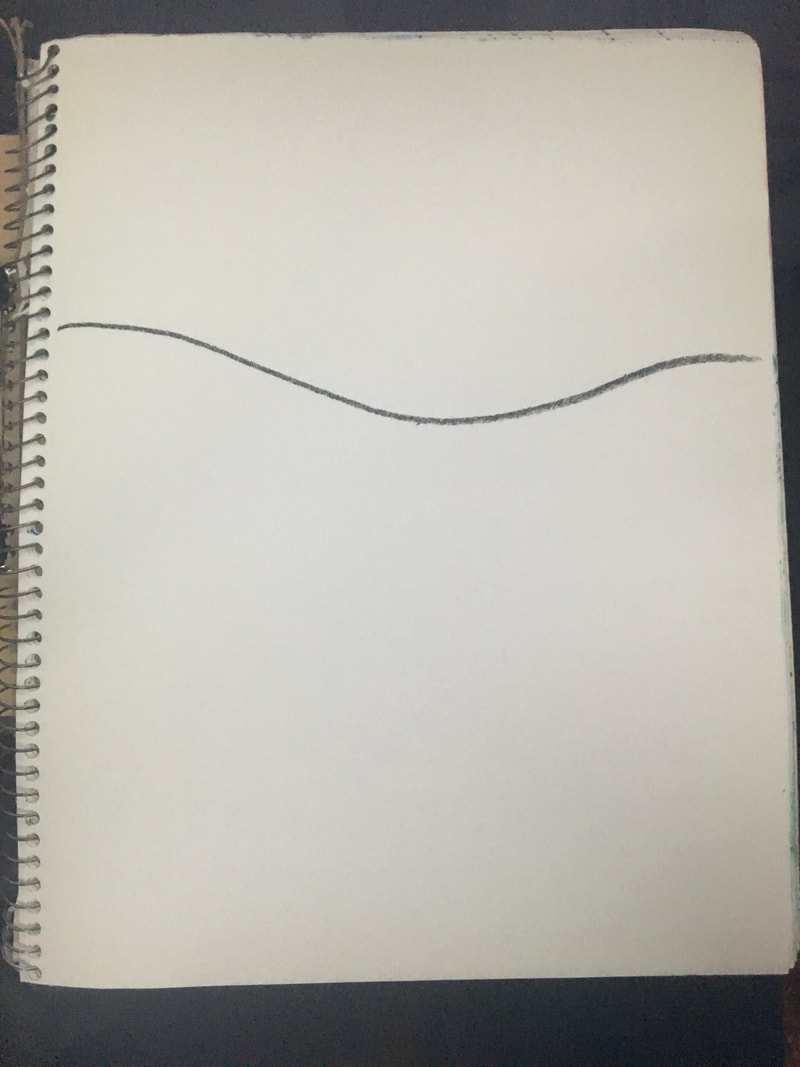
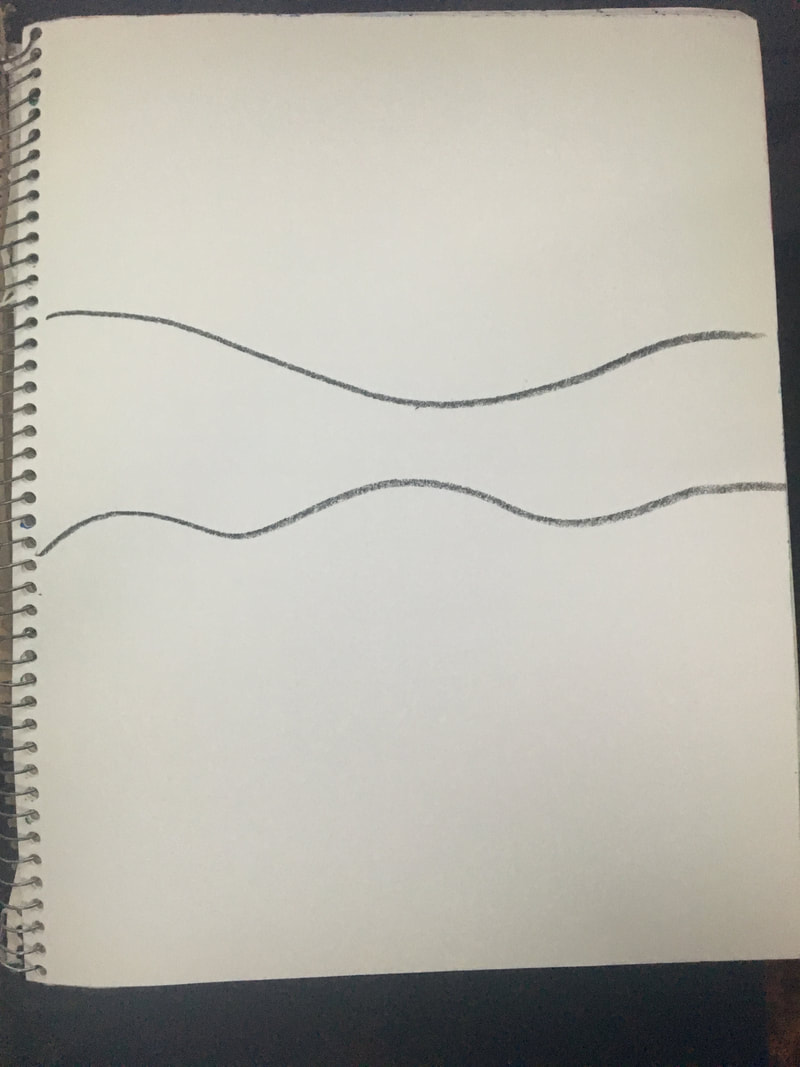
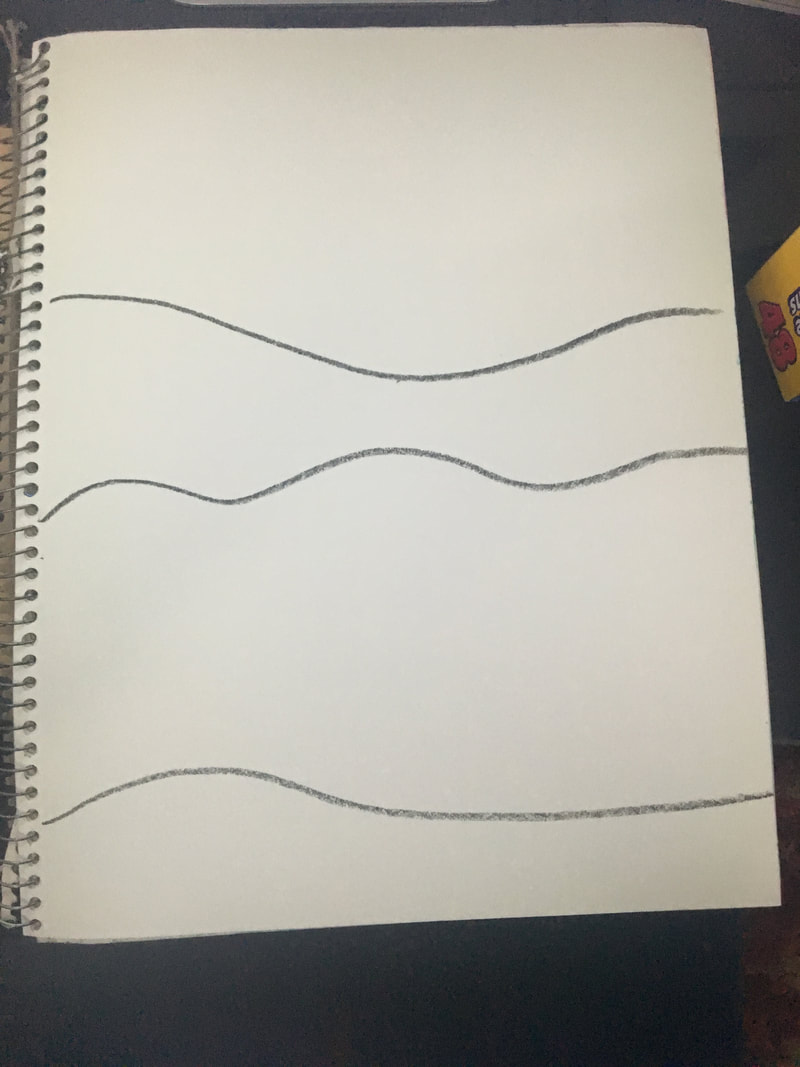
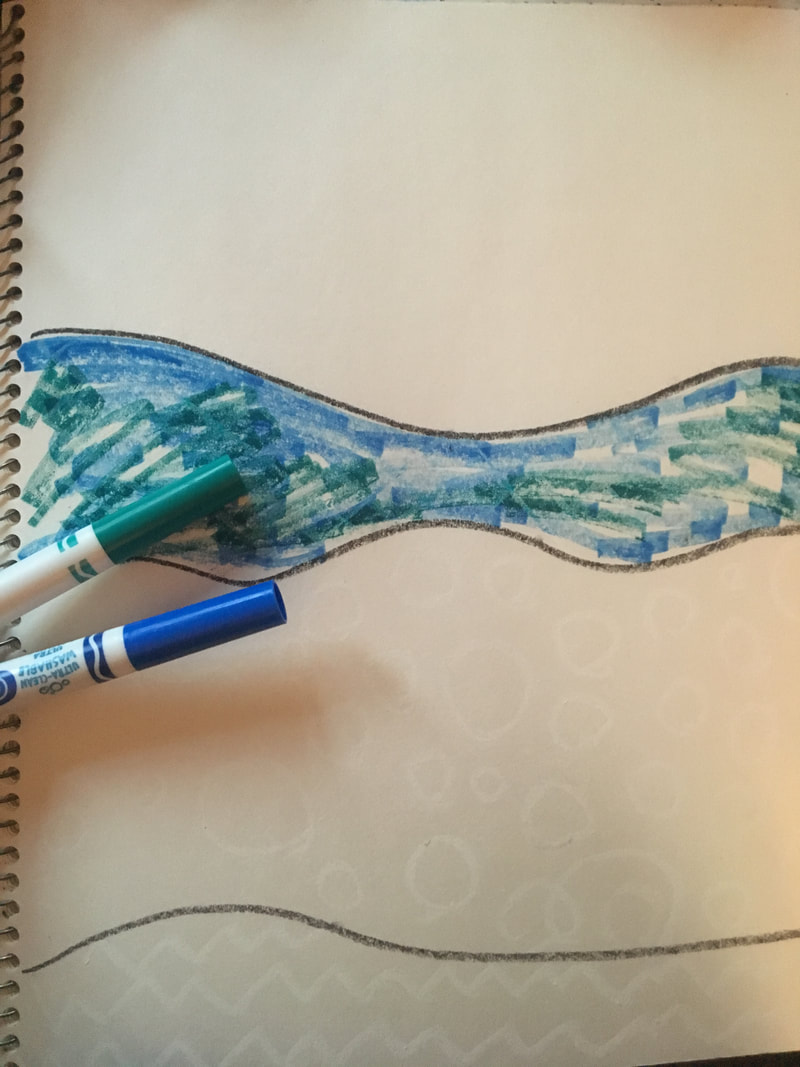
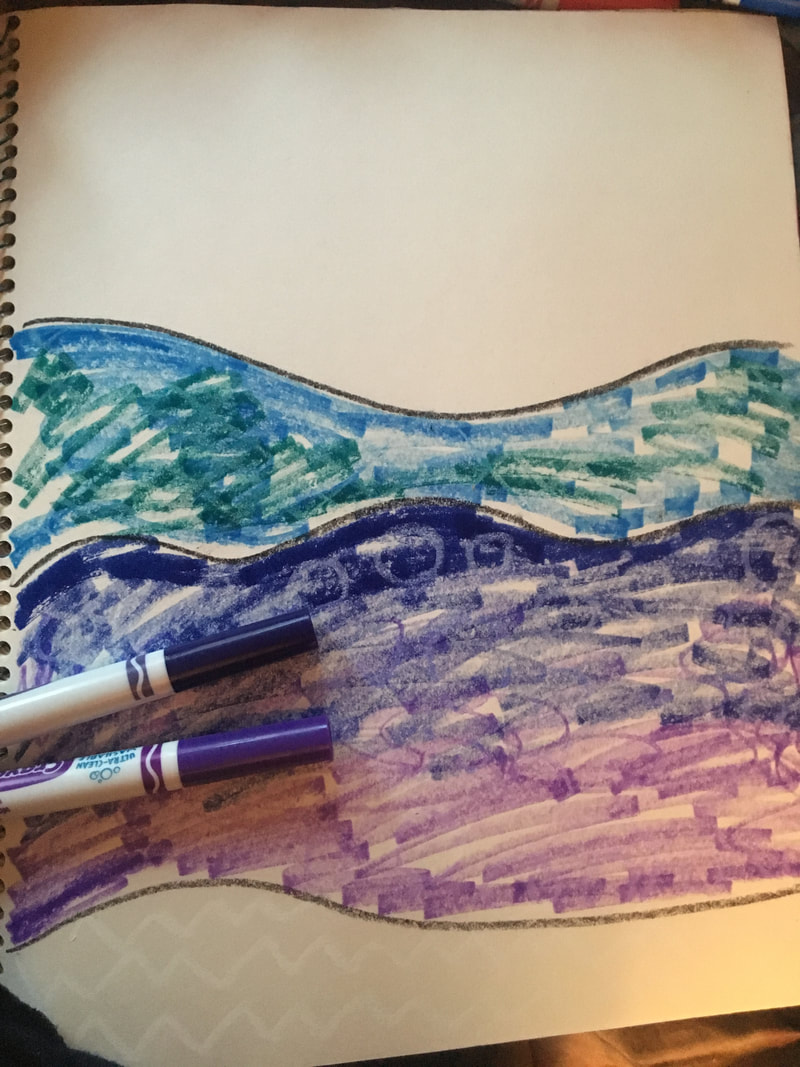
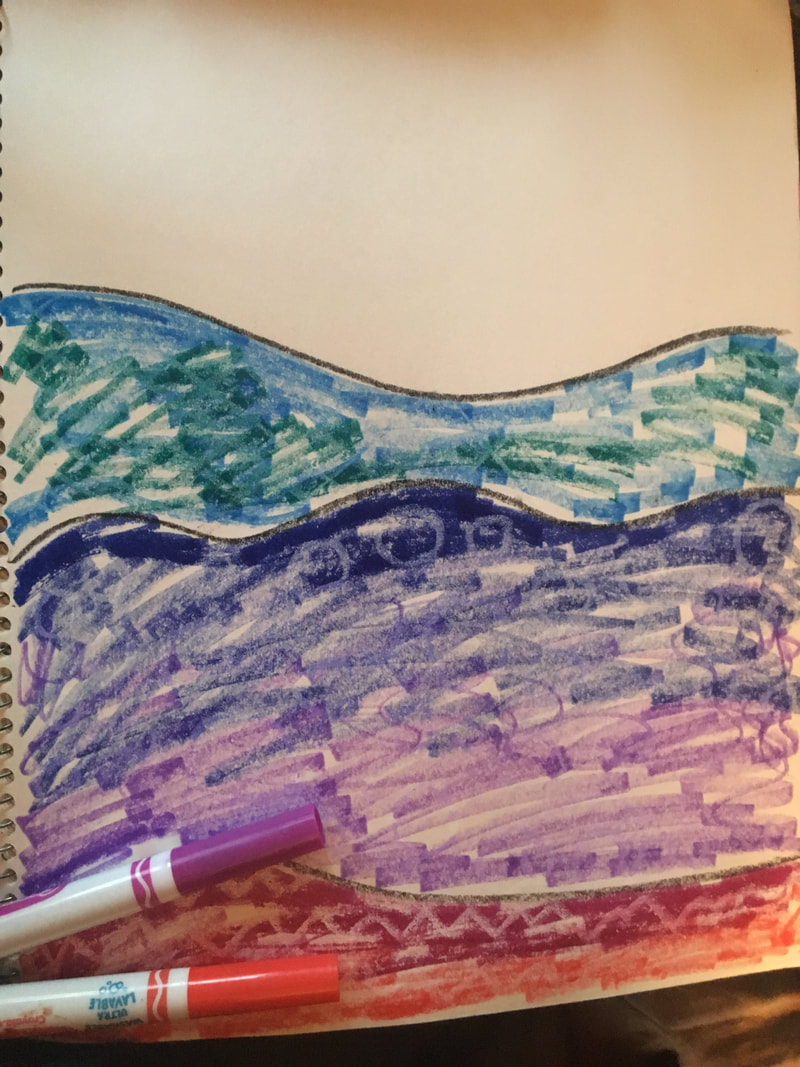
| STEP 1: Create your LANDSCAPE A HORIZON LINE is a line that separates the ground from the sky in a work of art. This line can tell the viewer what type of landscape you are creating. Is it a flat field, jagged mountains, or rolling hills? Check out the video here to learn more about how artists use a HORIZON LINE. After your Horizon Line, add to more lines underneath. This will turn your landscape into 3 different sections. We will need these in the next step. | |
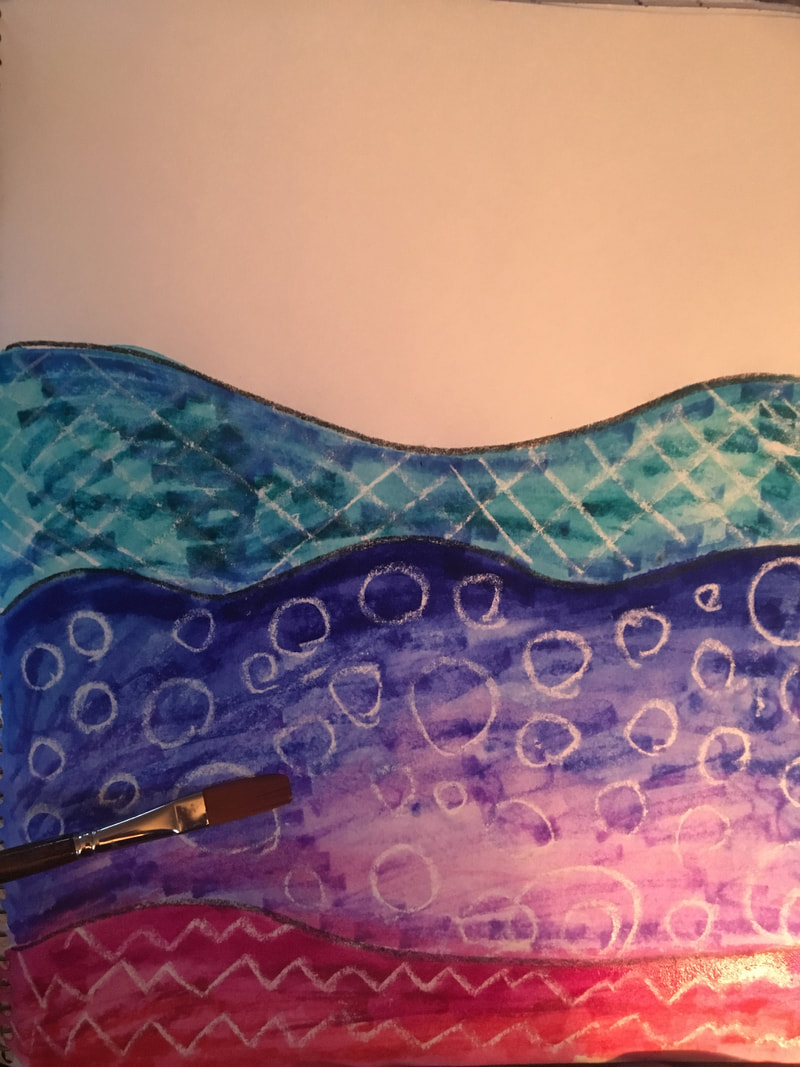
| STEP 2: Add PATTERNS Using a white crayon, create a different pattern inside each section of land below your sky. You will not be able to see these patterns at first. But they will magically appear later. Take a look at the handout for ideas of patterns to use.  |  |
STEP 3: Choose your Color Family
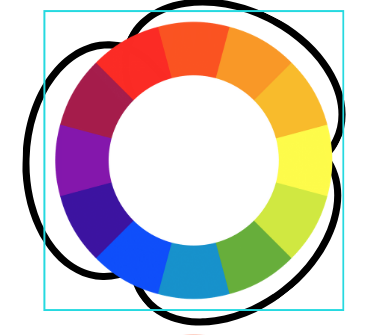
RELATED COLOR FAMILIES: These are colors that are like family, they are very close together and stand by each other's side. These FAMILIES consist of two of the three PRIMARY COLORS and the SECONDARY COLOR they mix to create. Needless to say, these colors mix very well and create beautiful colors when painting. Look at the color wheel below for ANALOGOUS Color Families.
RELATED COLOR FAMILIES: These are colors that are like family, they are very close together and stand by each other's side. These FAMILIES consist of two of the three PRIMARY COLORS and the SECONDARY COLOR they mix to create. Needless to say, these colors mix very well and create beautiful colors when painting. Look at the color wheel below for ANALOGOUS Color Families.
 | 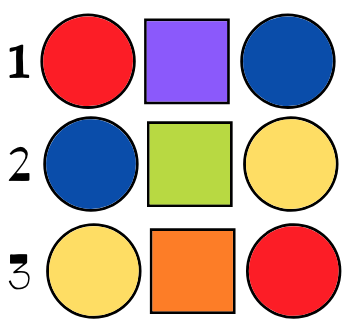 |
I chose the related color family that uses REDS, BLUES and all different types of PURPLES.

Using your washable markers color each section of your landscape using your ANALOGOUS COLOR FAMILY. When you are finished carefully brush over top of your land with water (if you do not have a paint brush, a cue tip or paper towel will work).
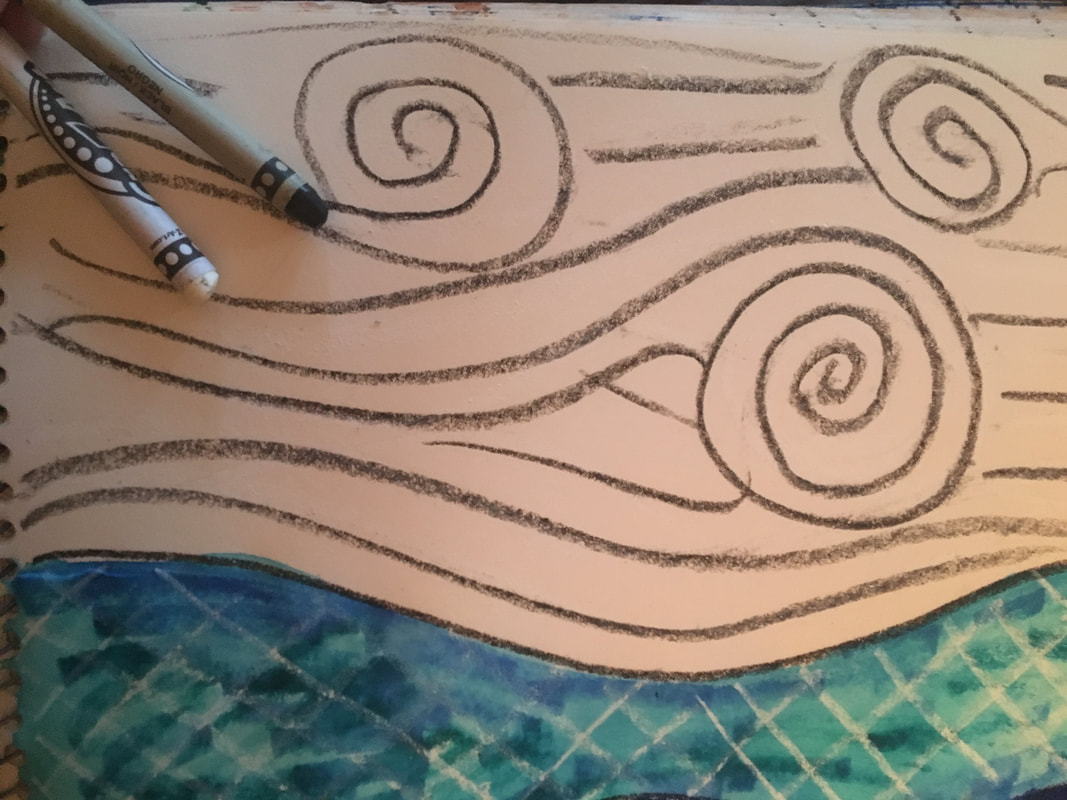
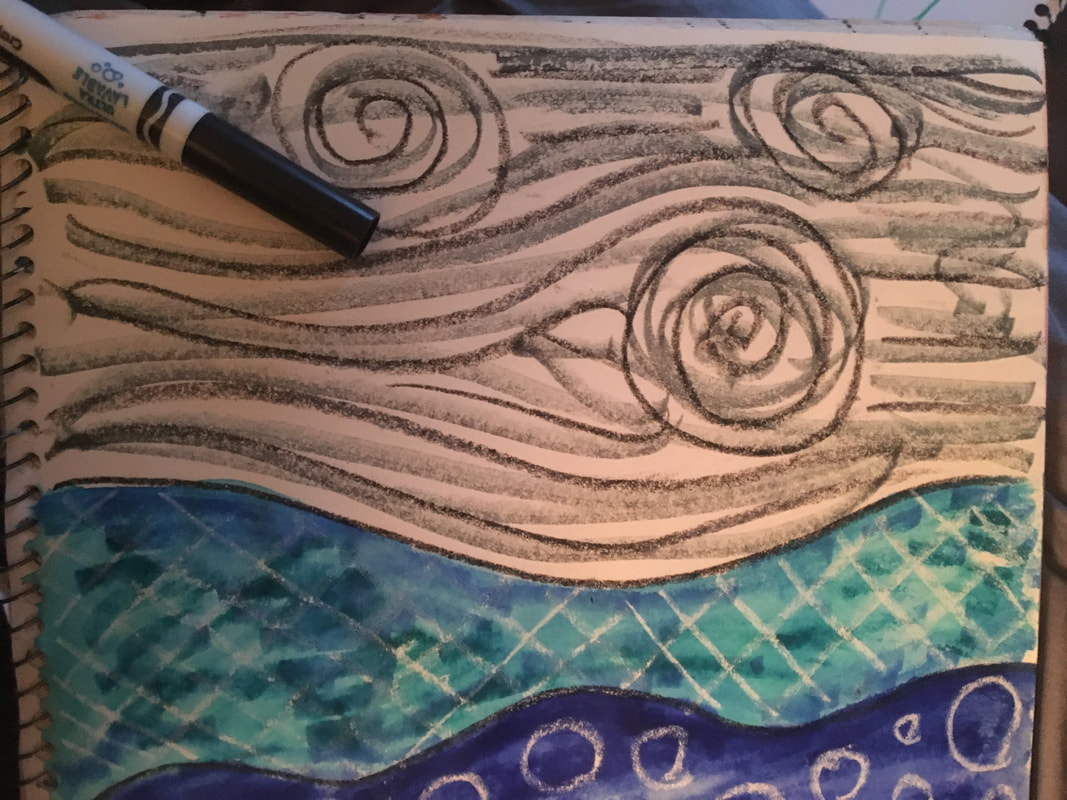
| STEP 4: The SKY! We will be using a Grayscale for the sky. This is not because we want our skies to look gloomy, but because we want something dull in the back so that the furry texture on our Truffula Trees will stand out and really POP! When an artist makes choices like this, it is to create CONTRAST in their artwork. **Remember a GRAYSCALE is all of the different VALUES of gray that fall between black and white. |  |

First, with your black crayon, draw LINES that can represent your wind. LINES are a very important element of art that can create the feeling of MOVEMENT in your artwork. After that, trace your wind lines with your white crayon...you can even add some more wind marks if you would like. Trace over those lines with a black washable marker and finally, brush over top of your sky with water.

STEP 5: Truffula Trunks!
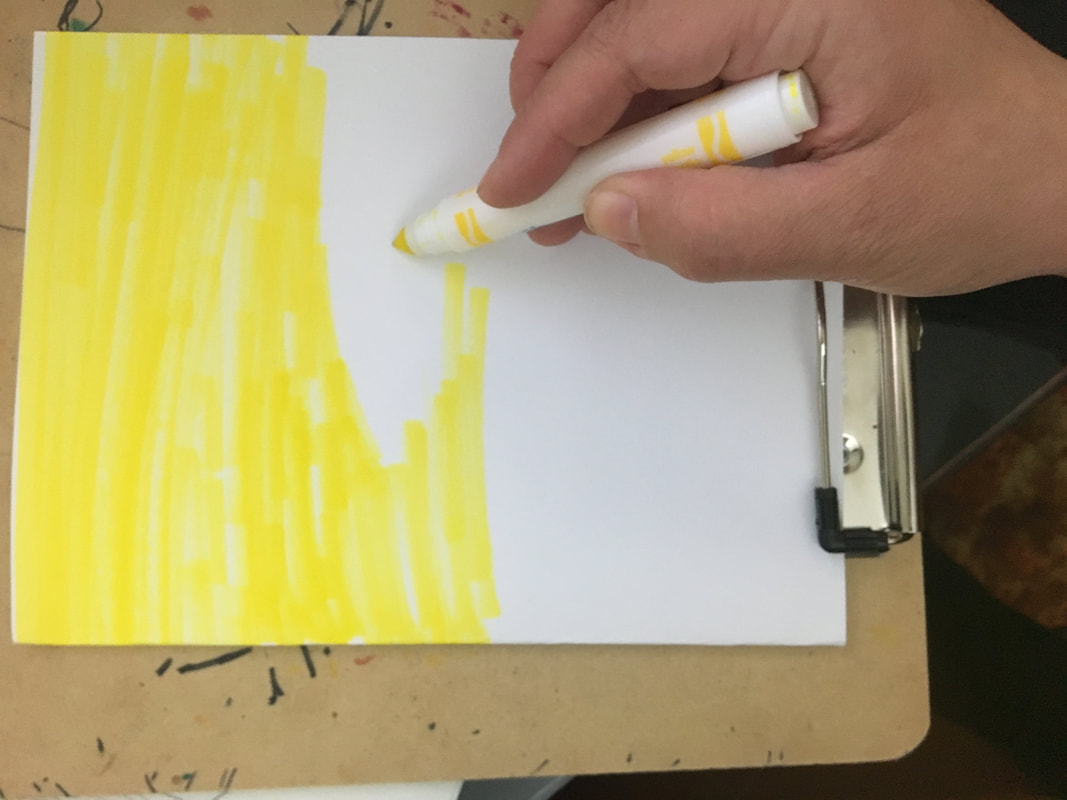
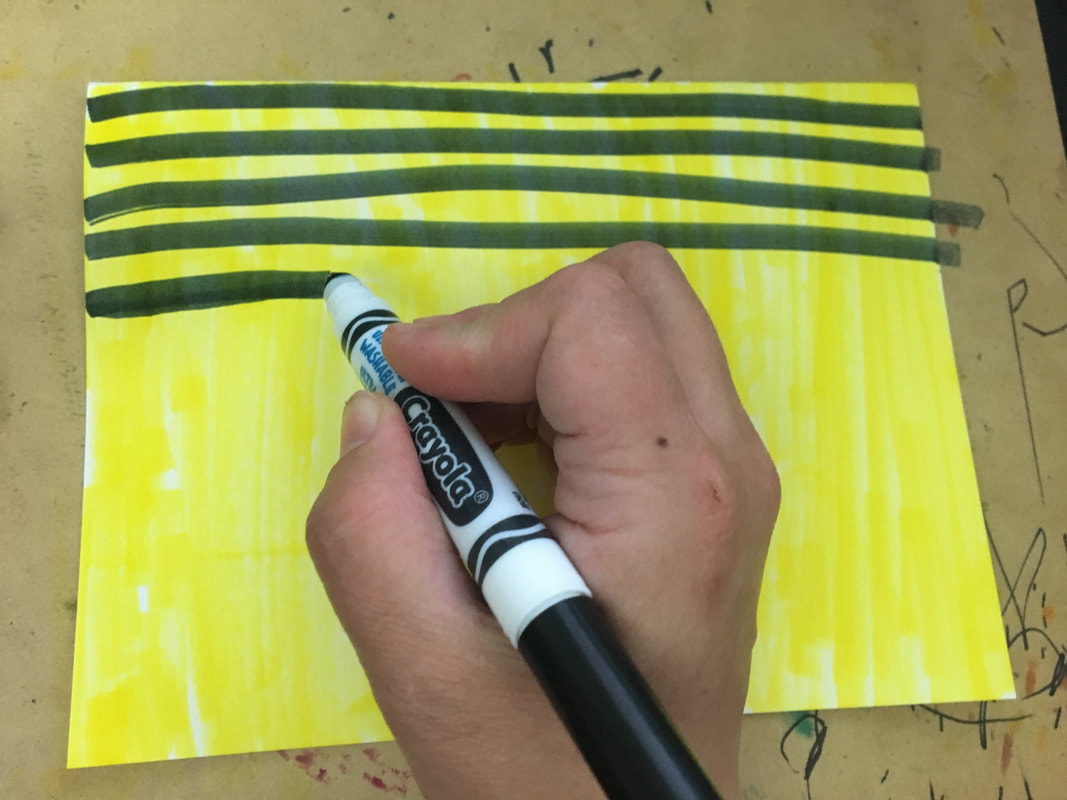
Using a small extra piece of paper, we are going to create a pattern of strips using markers. Choose any color you would like to use and black. The black will help add CONTRAST like we discussed previously. I chose to use YELLOW and BLACK from the book, but you can use whatever you would like. Because markers will sometimes bleed into each other, start with your color to fill in your paper first. After you fill the paper, add strips with your black marker. Your strips can be straight or wiggly, (we will be cutting these up later.)
Using a small extra piece of paper, we are going to create a pattern of strips using markers. Choose any color you would like to use and black. The black will help add CONTRAST like we discussed previously. I chose to use YELLOW and BLACK from the book, but you can use whatever you would like. Because markers will sometimes bleed into each other, start with your color to fill in your paper first. After you fill the paper, add strips with your black marker. Your strips can be straight or wiggly, (we will be cutting these up later.)
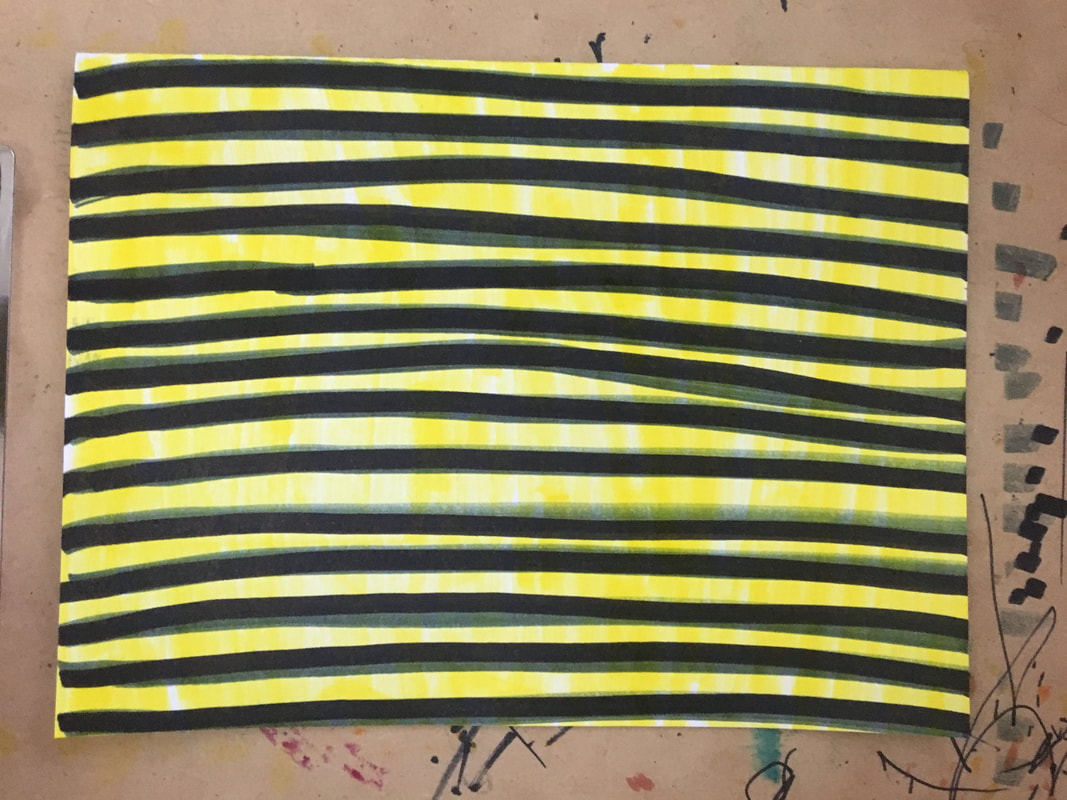
| When you finish with your striped pattern, we will cut our paper up into strips to create our tree trunks. In a landscape artists can create DEPTH or SPACE by using the SIZE and PLACEMENT of their objects. For example, if I want my tree to look like it is very far away, I will make it SMALL and place it HIGHER UP on my paper. If I want my tree to look like it is very close up, I will make it LARGE and place it towards the BOTTOM of my paper. Take a look at my example here. After you cut your trunks, glue them in place. |  |
STEP 6: The Truffula Tops!
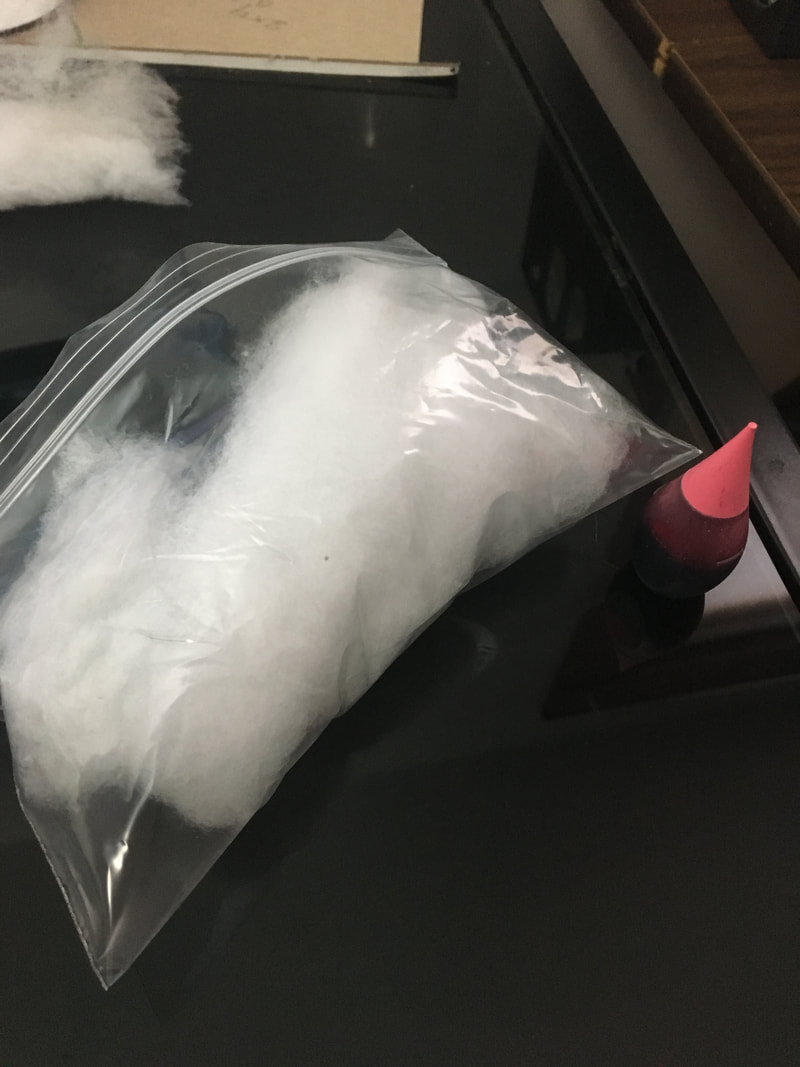
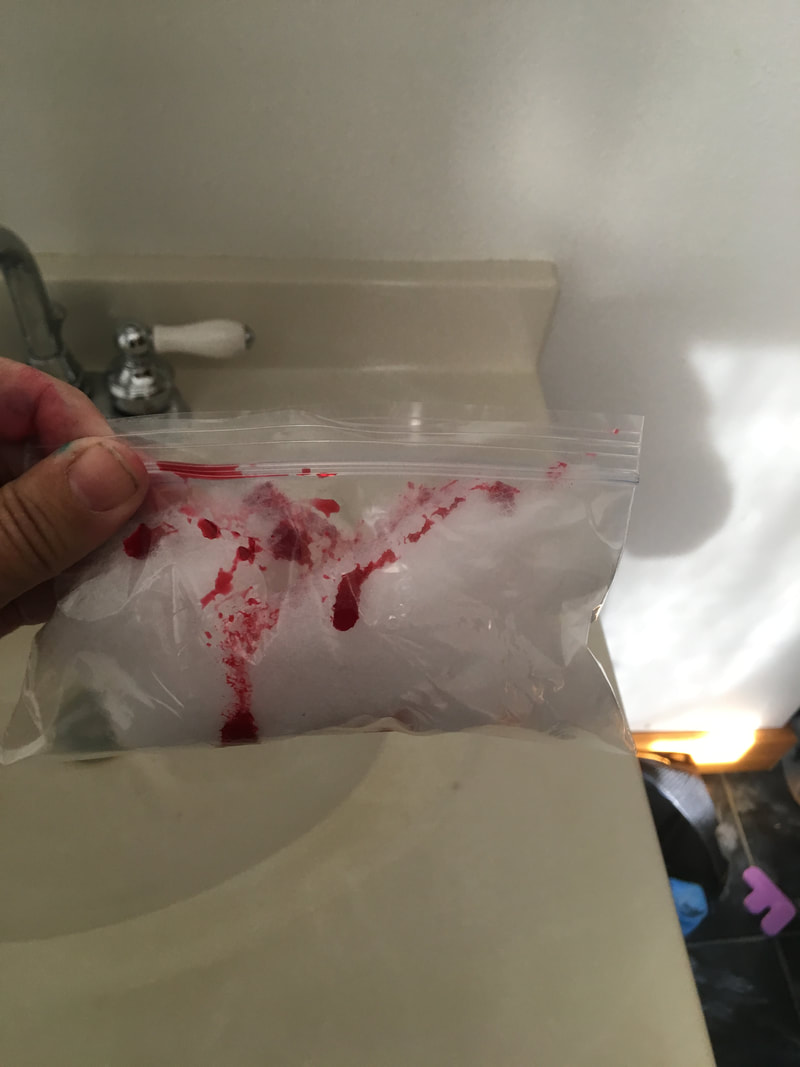
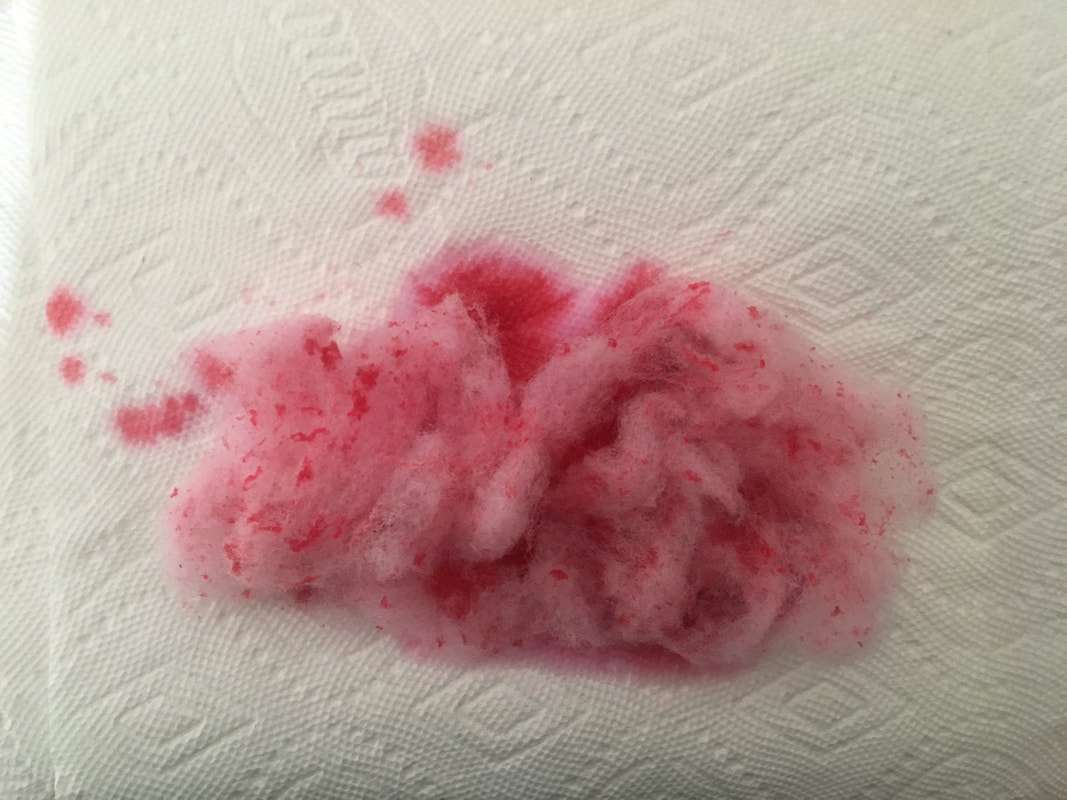
Alright, you will now be creating the fluffy tops of your Truffula Trees. You can use any material you would like for this step - puffy paint, cut paper, tissue paper, cotton balls (died with food coloring), yarn poof balls, paint etc. I am going to use cotton balls and food coloring to create my poofs! First, took a small handfull of cotton balls and stretched them out so that they were a bit fluffier. After that, I placed them in a zip loc baggy with 10-ish drops of food coloring. Next, I added a splash of water, sealed the bag and mixed it all up until the cotton was colored. Lay them on a paper towel to dry.
Alright, you will now be creating the fluffy tops of your Truffula Trees. You can use any material you would like for this step - puffy paint, cut paper, tissue paper, cotton balls (died with food coloring), yarn poof balls, paint etc. I am going to use cotton balls and food coloring to create my poofs! First, took a small handfull of cotton balls and stretched them out so that they were a bit fluffier. After that, I placed them in a zip loc baggy with 10-ish drops of food coloring. Next, I added a splash of water, sealed the bag and mixed it all up until the cotton was colored. Lay them on a paper towel to dry.

 |
|
 RSS Feed